Quantcast
Channel: Website Building for Mac OS X | EverWeb Website Builder
Viewing all 375 articles
Browse latest View live

Changes In EverWeb That Make Your Website Faster

$
0
0

The speed of your website is a top priority for us and an important indicator of the quality of your site. We know that visitors hate slow loading website and that search engines can penalize your website for being slow.

EverWeb already includes lots of features to help make websites load quickly, but we’re always working on more.

In EverWeb 1.8 we made a number of changes to make sure you website loads faster for you visitors;

1. We only include jQuery when required by a widget you may be using

2. We provide an option when importing PSDs, TIFFs and PDFs to convert them automatically to a web format, significantly reducing the file size and the time it takes a them to load in your browser

3. We have an all new option to automatically optimize PNG files on export so they have a smaller size but the same image quality

4. We only include the styles and typefaces actually used with Google Font so they load faster

Along with the above, we have already implemented significant optimizations for the next version of EverWeb. In fact, the new features coming in version 1.9 have already reduced the EverWeb website by 35% in file size and made it load significantly faster.


EverWeb 1.8.1 Released!

$
0
0

We have just released an update to EverWeb. This new version (1.8.1) contains several fixes for many widgets which previously displayed a ‘file not found’ error message after publishing on OS X 10.7 and 10.8. We have also included an updated PDF user manual, which can be found under the Help menu. Download the new update from within the application by going to EverWeb > Check For Update, or by visiting EverWeb’s downloads page.

Other fixes include a fix for certain widgets not being displayed properly when previewed, and a fix for the video widget. There are also new localizations for Japanese, Spanish, Italian, and German.

The full list of changes can be seen below.

Just a reminder that if you were experiencing issues publishing with 1.8, please use the Publish Entire Site option from the File menu.

CHANGES
– Fixed a bug in 1.8 where image sliders, video, audio, and many third party widgets would display file not found errors when published on OS X 10.7 and 10.8
– Fixed a problem with background stretch images on Master pages not drawing properly
– Should fix a problem where some widgets would not properly display their preview within EverWeb and only display a green ‘updating’ icon
– An updated PDF user manual (under the Help menu)
– A fix for the video widget no working (make sure to make a small change to any page that uses the video widget so that it will be republished OR republish your entire site)
– A fix for some changes not publishing, specifically the navigation bar when adding new/deleting/renaming pages that are included in the navigation bar
– It includes debugging information for the crash some users are getting when publishing. If you continue to get a crash when publishing with this version, please make sure to copy and paste the crash report to us so that we can take a look at it.
– Checking for unused assets and checking for which page is using an asset works for custom code in the header and footer fields now
– No longer uses fancy quotes in header/footer fields
– ‘Check for Update’ will download the right version for 10.6 users now
– Imported new localizations: Japanese, Spanish, Italian, German

How to Stop Referral Spam in Google Analytics

$
0
0

What is Referral Spam?

Referral spam is a technique used by spammers to make it seem like you are getting a lot of visitors from their website which entices you to visit their site. This gets more visits to the spammers website.

Although technically harmless to your website, the biggest issue is that referral spam appears in your analytics software, such as Google Analytics, and misrepresents the data in there. It will appear as if you are getting more traffic than you actually are and your conversion rates will be significantly lower.

You can see if you are getting referral spam by doing the following;


  1. Log into your Google Analytics account
  2. Go to your website Acquisition->All Traffic->Referrals
  3. You can usually identify referral spam because it will come from a domain that either has nothing to do with your website content, or implies it is related to seo, traffic monetization etc… Referral spam is usually 100% new users, 0% conversion and a very high bounce rate
Referral Spam Example List

Referral Spam Example List

Can Referral Spam be Stopped?

There are a couple things you can do to help slow down referral spam. However, because these spammers use many different domains and techniques, it does require some maintenance.

You also cannot remove any previous referral spam from your Google Analytics, you can only make sure that in the future you do not see them.

Also, there are so many different domains that spammers may use. In fact there are thousands of domains that may appear in your Google Analytics.

The technique suggested here requires a list of domains so that Google, or your website, know to either not count the traffic as real traffic, or completely block them from accessing your server.


How to Stop Referral Spam

You can stop referral spam by creating a Google Analytics filter which will make sure that when you check your stats in the future, these spam websites won’t appear in any Google Analytics reports. Unfortunately you won’t be able to remove them from previous reports with this filter. To do that, you’ll have to create a Segment which we’ll have to do another blog post for in the future.

To set up a filter to stop the referral spam, follow the steps;

  1. Log into Google Analytics
  2. Go to your Reports page for your website
  3. Click the Admin tab at the top of your browser
  4. On the next screen select ‘All Filters’All Filters
  5. Then press the ‘New Filter’ button
  6. New Filter Button
  7. On the next screen you will actually set up your filter. Here are the settings to use;
    1. Filter Name: Referral Spam
    2. Filter Type: Custom
    3. Exclude: Selected
    4. Filter Field: Campaign Source
    5. Filter Pattern: A list of domains separated by a | character. Do not include http:// or www. They are only domain names. The list will keep changing as you notice more referral spam from new domains. Here is what I have set up in this screenshot which you can copy and paste into this field;4webmasters.org|trafficmonetize.org|guardlink.org|best-seo-offer.com|howtostopreferralspam.eu|free-social-buttons.com|100dollars-seo.com|webmonetizer.net|erot.co|floating-share-buttons.com
      Google Analytics Referral Spam Filters

      Set up your referral filter as shown


  8. Lastly select all ‘Available Views’ and press the ‘Add’ button to add them to the ‘Selected Views’ list.
    Google Analytics Referral Spam Filters

    Apply all your filters to your views


  9. Now click Save

Starting in 24 hours, your new reports will stop showing the domains you have entered in the above steps.

Blocking the Domains from Accessing your Website

You can actually block the domains from even accessing your website if you have the knowledge to create a .htaccess file. If you use your own web hosting provider you can create a .htaccess file as described here,

For EverWeb + Hosting customers will be adding this feature automatically for you in an upcoming release. Stay tuned for our announcement.


I hope this post was useful and if you have any questions, be sure to post in the comments below.


Easily Create ‘Sticky’ Buttons in EverWeb

$
0
0

Many websites today have social media buttons pinned to the side of the page so that they are always clickable as you scroll up and down the screen.

This is a great feature for your website and is easy to do with EverWeb 1.8. To achieve the effect need to use the new ‘Fixed Position’ feature in the Metrics Inspector. ‘Fixed Position’ lets you lock the position of an object on its x-axis. This means that as you scroll up and down your page (i.e. along the y-axis), the object remains fixed in place.

Just follow the simple steps below to easily have social media buttons on the vertical and always visible.

  1. First add  the social media buttons that you want to your page, e.g. Facebook, LinkedIn, Pinterest, Email, Google Plus etc. Using the ‘Insert > Button menu to add buttons to your page or use drag and drop your buttons from the Widget Inspector on to your page. When placing buttons line them up vertically close to the left or right hand edge of the page.
  2. When you add each button, make sure that you tick the box ‘Fixed Position’ on the Metrics Inspector. This will lock your button in place on the horizontal x-axis (see screenshot below.)

    screenshot_11

    To fix the social media button in place, first select it, then checkmark the box ‘Fixed Position’ in the Metrics Inspector, as shown in the example above.

  3. Remember to make sure that your Social Media buttons are properly aligned and distributed.
    Select all of the buttons that you have placed on the page. Next use the ’Arrange > Align Objects > Left’ menu so the buttons appear flush to the left, and use ‘Arrange > Distribute Objects > Vertically’ to evenly space the buttons.
  4. If you are adding buttons to a Master Page, you may need to use ‘Always on Top’. Objects on Master Pages lie underneath those on your normal web page. If you find your buttons are not visible use ‘Always on Top’ so that they appear above all other objects on your page.
  5. The last  step is to use Preview to see how your design looks and to test out your ‘Sticky’ buttons before publishing (see screenshots below.) Always remember to test your buttons. Once you have published your website, don’t forget to test each button to make sure that your links work properly!
screenshot_12

Use Preview to see how your ‘Sticky’ buttons work.

screenshot_13

As you scroll up and down your web page, the social media buttons remain in place as the page content slides under the buttons.

How to Make Fixed Headers in EverWeb

$
0
0

EverWeb 1.8 has a host of new features that give you more design flexibility than ever. In the example below, we are going to use a combination of three of these new features – ‘Always on Top’, ‘Fixed Position’ and ‘Full Width’ – to create a fixed header. With a fixed header  your web page contents slide under the the ‘fixed’ header as you scroll up and down the page.

In this example, we will create a Master Page using the Spa template from EverWeb’s template library. The Master Page can then be applied to any web page in your website project.

  1. To start, add a new Master Page. Click on the ‘New Master Page’ button or select File-> New Master Page…’ from the menu. This example uses  the ‘Home’ template of the Spa theme. Once you have created the Master Page, double click on its name and over type it with ‘Spa Master Page’.
  2. In the Page Inspector, set the ’Header Height’ to 160.
  3. As this is a Master Page, remove any objects that are in the body of the page. Your page should look similar to the screenshot below.spa1
  4. To add a Navigation Menu to the header, just drag and drop the Navigation Menu Widget in to the Header section. Place, size and style all the objects that are in the header as desired such as shown below.spa2
  5. Select all the objects in the header and then tick the checkbox ‘Fixed Position’ in the Metrics Inspector This will keep the objects in place when you scroll up and down the web page.
  6. Use the Shapes button in the Toolbar to add a rectangle to the page. In the Metrics Inspector tick the checkboxes ‘Full Width’ and ‘Fixed Position’. The rectangle will be stretched across the full width of the screen.
  7. Move the rectangle to the top of the the page and set the height of the rectangle so that it is meets the bottom border of the header as shown below. Remember that you may need to hold the Cmd key down to move the rectangle from the body of the page into the header.spa3
  8. As the rectangle now obscures the other objects in the header (as in the above screenshot) select Arrange-> Send to Back from the menu to place it behind all of the header objects.
  9. With the rectangle now in place change it’s color as desired using the Fill section of the Shapes Options.
  10. To complete the Master Page, select all of the objects in the header. Select Arrange->  Always on Top from the menu.The reason for using ‘Always on Top’ is that Master Page objects normally lie underneath the contents of web pages. In our example, however, we need the Master Page header objects to be on top so that web page contents can slide beneath them. ‘Always on Top’ is how we can force objects to be on top of everything else in order to achieve the effect we want.
  11. Once your Master Page is complete, create a web page and attach the Master Template ‘Spa Master Page’ using the ‘Master Template’ dialog box in the Page Inspector. Add the content that you want to include in the body of the page. As you scroll up and down the body contents, the contents will slide under the header.
  12. When you have completed your page, use Preview to see how the page looks before you commit to publishing it on the Internet. You can see the results of scrolling in the screenshots below.
    The initial view of the page...

    The initial view of the page…


spa5aa

… and the effect when scrolling down the page.


Update Your Website with EverWeb’s Updated Image Slider

$
0
0

EverWeb’s Image Slider has gained new features in version 1.8 with the addition of slideshow Captions, a Transparency option for your Slideshow background and the ability to add URL links to slides. So, why not give an existing slideshow an update or create a new slideshow from scratch incorporating some of these new features?

If you want to start a new slideshow, just drag and drop the ‘Image Slider’ widget from the ‘Widgets Inspector’ on to your page. Place and size the Image Slider placeholder as desired.

With the placeholder still selected, go to the ‘Widget Settings’ in the ‘Inspector Window’. Here is where you add, arrange and delete slide images. Drag and drop images from anywhere on your computer into the Assets List. To reorder the files in the list just drag and drop the image filename to where you want it. You can use Shift+click to select contiguous files or Cmd+click to select multiple files that are not next to each other in the Assets list.

If you have added an image that you do not want, highlight it’s filename in the Assets List and press the backspace key to remove it. Although the filename disappears, it can be always be added back using the ‘Choose…’ button.

You can also add images using the ‘Choose…’ button. When using ‘Choose…’ you will see a list of the image files  associated with your EverWeb Project. If the image file you want is not listed, click on ‘Choose…’ at the top of the list and navigate to where the image files you want are located. In EverWeb 1.8 you can now select contiguous files by using Shift+click to select contiguous files or Cmd+click to select multiple files that are not next to each other

When selecting Images for your slideshow, make sure that they are optimised for use on the Web. Large image files  slow the loading of your web page and affect the performance of your slideshow. EverWeb detects large files on import and offers you a choice as to whether you want to use the original file or a web optimised version.

screenshot_41

It’s also important to use images of the same size, quality and orientation in your slideshow e.g.  your images should either be all portrait or all landscape and not a mix of both. Images should be also of the same dimension and quality in your slideshow.

In the example below we have created a web page for a fictional company, ‘Fantastic Journees Inc’, with the company name in the top left hand corner of the page. Below the company name is the Image Slider followed by a Navigation Menu with a rectangular colored shape behind it providing a background contrast.

17 SS1

The original Image Slider page created in EverWeb 1.7.

We can start to update the Image Slider by making it ‘Full Width’. Select the Image Slider then go to the Metrics Inspector and click on the ‘Full Width’ button. In addition make the Image Slider ‘Fixed Position’ at the same time. Lastly, select Arrange-> Always On Top from the menu.

Next select the company name and make this also ‘Full Width’, ‘Fixed Position’ and ‘Always On Top’. If the find that the text is right up against the left hand margin of the page, use the Text Inspector to add a margin in using ‘Insert Margin’.

Repeat the above steps for the Navigation Menu and it’s background coloured rectangle. Rearrange any objects that may have moved position on page due to the use of ‘Fixed Position’.

With the basic page layout updated, let’s update the Image Slider. In this example we are going to add a caption to each slide.

To add a caption to a slide, select the image file name in the Assets List. Next enter the text  you want for your caption in the ‘Caption’ box. To change the font size and style, click on the Fonts button and use the Fonts Panel to select the options that you want to use.

If you want to add a URL link, enter it in the ‘URL’ box. If your visitor clicks on the image they will be taken to the page you have linked. When adding links, make sure you use the full descriptor e.g. ‘http://www.fantasticjournees.com/homepage.html. Remember to test the link using ‘Preview’ before going live with your changes.

Note that if you enter a link in the ‘URL’ box, it will override ‘Click to enlarge image’ if you have ticked it in the Behaviour section.

If you want to add a background colour to your caption select the ‘Background’ color swatch in the ‘Caption’ section at the bottom of the Widget Settings. Use ‘Background Opacity’ to change the background transparency. If you do not want a background color at all set the value to zero.

You can place the caption where you want within the Image Slider using a combination of ‘Caption Left’ and ‘Caption Top’. These options operate like x and y co-ordinates when placing the caption. When you publish the page, the caption automatically scales and resizes as you change the size of the browser window as seen in the two screenshots below.

18SS1

The Image Slider is full width and resizes as you adjust the browser size, as does the Navigation Menu.


18SS2

As the browser window shrinks you see that the caption automatically resizes. You can also see the results of the use of Fixed Position and always on top here as the items below the Navigation Menu scroll under the menu.

Use ‘Caption Width’ to define the height and width of the caption text and background box color if you have one.

When creating captions for all of your slide images, try to make the text about the same length for each slide so that the caption box remains a consistent same size from slide to slide when viewing the slideshow.

In addition to captions, you can now make the slideshow background transparent. This is useful when you use Thumbnails and want the slideshow to blend in with the page background color. See the two screenshots below.

18sst1

The Image Slider with Thumbnails and the original background color.

18SSt2

The Image Slider with Thumbnails and with transparent background selected.

And finally, don’t forget that there are some great Transition effects to play with such as Pulse and Flash. Try experimenting with these as they can really liven up a slideshow especially when used with vibrant background colours that you set using the ‘Background’ color swatch in the Appearance section.

The Image Slider update keeps your website slideshow fresh and up to date a new modern, dynamic look and feel. With a little experimenting of Image Slider’s new, and old, features, you will give your visitors a great slideshow experience!

Asset Management in EverWeb 1.8

$
0
0

EverWeb manages the files you use in your website Project through the Assets tab in the Inspector Window. Image files are listed in the ‘Images’ section whilst other file types, such as audio and video, are listed in the ‘External Files’ section of the Assets List. Files are automatically added to the Assets List when you drag and drop them on to your web page from any source outside of EverWeb. Alternatively, files can be drag and dropped directly on to the Assets List itself. This is useful if you want to add assets for later use  e.g. adding a collection of images to use later when creating a slideshow for a web page.

Files in the Asset List are only those that have been used in the Project you are working on. You can rename any file in the Assets List by double clicking on the name, editing it, then pressing the enter key. Whist you can change the name of the file in EverWeb, t’s important to remember that EverWeb makes a copy of the file when you import it. Therefore, if you need to keep the original file and the copied file in sync with each other, rename the file before you bring it in to EverWeb. To delete a file from the Assets List, just highlight it and press backspace. This will only delete the file in the Project, it will not delete the original source file.

An asset can be used on more page in your Project. Just drag and drop the asset from the Assets List to your pages as required. Using this method saves you having to import the asset multiple times, and saves you from having multiple copies of the same file in your Assets List.

Over time, you may find that your Project file has a large number of assets that you want to have organised. You may also want to quickly find and delete assets that have been unnecessarily duplicated or are no longer used in your Project. This can happen when you add an asset, such as an image, to a page, then remove it later. Although the image is removed from the web page, the associated file is not removed from the Assets List. This is so that the asset remains available for use within the Project without the need to reimport it, or where the asset is already in use on another page in your project.

Furthermore, if you have any slow loading web pages you may want to troubleshoot the assets used on that page in case you have accidentally included a large sized asset file that is causing the problem.

EverWeb version 1.8 provides you with new and enhanced tools to help you manage these types of situation. We start by searching for particular assets you may want to find.

Click on the ‘Assets’ tab to see all the assets included in your Project. You can immediately search for an asset by typing its name in the search box. Alternatively, click on any asset in the list so that it is highlighted and start typing the name you are searching for. EverWeb uses a ‘predictive search’ so that as you continue typing, the list of search candidates narrows down based on your input.

Searching for assets can also be achieved by sorting the Assets List in a number of different ways. The sort options are located on the drop down menu that is accessed by clicking on the up/down arrows on the right hand side of the dialog box.

The first option, ‘Custom Sort Order’, displays assets based on how you have constructed your Asset List. One of the features of the Assets List is that you can list assets as you like just by dragging and dropping them to where you want them in the list. Use ‘Custom Sort Order’ to restore your self made ordering if you have been previously using other sort options.

‘Sort By Name’ sorts assets in descending order (0-9 then a-z), ‘Sort By File Size’ and ‘Sort By Date Added’ also list your asset files in descending order with the largest file size, or most recent date added, listed at the top of the sorted list respectively.

In addition to sorting assets in the order you want, the ‘Show File Info’, when ticked, displays file size, date added, image dimensions (width by height in pixels) and resolution in dots per inch (dpi) information. Using ‘Show File Info’ in conjunction with ‘Sort By File Size’ can quickly and easily help troubleshoot where large files may be slowing page load times.

The last option on the drop down menu is ‘Find Unused Assets’. As you develop and maintain your website, you add images, and/or other file types, to your pages then delete them later as your needs and requirements change. As mentioned earlier, deleting such objects from the web page does not remove them from the Asset List. Use the ‘Find Unused Assets’ option to search for, and highlight, assets that are not being used in your Project. Once the search is complete, EverWeb asks if you want to delete the non-used assets. If you select ‘Yes’ the unused assets are removed. This action cannot be undone unless you restore a backup that you took immediately before removing the unused assets.

If you select ‘No’, the unused assets remain highlighted in the Assets List. You can now review the unused assets to see what you want to delete and what you want to keep. Use Cmd+Click to deselect any highlighted file you want to keep. Once you have finished your review, press backspace to delete the remaining highlighted unused assets.

Removing unused assets from the Assets List helps reduce your Project file size. It also has the benefit of helping you reduce organisational clutter so that finding the assets you do want to use is easier.

There may be times when you want to know on which pages a particular asset can be found. To locate all pages that use one particular asset, click on the asset in the Assets List so that it is highlighted. If you just hover the mouse cursor over the asset then secondary click, you will only see an option to ‘Delete’ the asset.

Next perform a secondary click (or right click if using a mouse). You will see a list of available options. The first option, ‘Copy File Path’ copies the physical path location of the asset file to the clipboard. The second option, ‘Copy Relative File Path’ is used to copy the relative file path of the asset to the clipboard. Both these options are useful to developers coding in languages such as HTML with EverWeb.

The third option is ‘Find Pages Using Asset’. When you select this option, EverWeb searches your Project based on the asset you highlighted. When EverWeb finds pages that contain the searched for asset, they are highlighted in yellow in the Web Page List on the left of the EverWeb Interface. Master Pages and/or regular pages may be highlighted. To remove the highlight, secondary click on the highlighted web page name and select “Remove ‘Unused Assets’ Indicator”. You need to do this separately for normal web pages and for Master Pages.

The ‘Find Pages Using Asset’ feature is great for finding instances where you may have duplicated the use of an asset. In the screenshot below, you can see that the asset selected appears in both Master Pages and regular pages. Inspecting the regular pages may reveal in this case that the asset has been unnecessarily duplicated and so can be removed, helping to improve the page load time when published.

screenshot_55

In the above screenshot, the asset ‘black.png’ has been searched for using ‘Find Pages Using Asset’. The highlighted pages in yellow show that the file is in use on both master pages and normal pages, so may be duplicated.

EverWeb also allows you to have a quick look at the image file itself using the Eye symbol to the right of the asset. This feature generates a ‘Quick Look’ view of the asset, which you can then view fully in OS X’s Preview program. Alternatively, to quickly preview an asset start to drag it out of the Assets List and onto the page. You will see a thumbnail appear as you do so. Drag the mouse back on to the asset again to finish this quick preview.

In summary, EverWeb’s Assets features provide quick and easy ways to search for your Project file’s assets, manage and maintain your website project, improve your workflow and have a website that remains lean with fast page loading times.

How To Use EverWeb’s SEO Features

$
0
0

One of the most important features of EverWeb is its Search Engine Optimisation (SEO) capabilities. However, you won’t find ‘SEO’ on any menu or listed in any dialog box. So why is SEO so important for your website and where do you find and effectively use EverWeb’s SEO features?

To answer such questions we need to first explore the nature of SEO. Much has been written about SEO as the ‘Holy Grail’ that every website developer must find. In reality, it boils down to the following things that you should know:

1. SEO is the term used to describe the way in which you make your website as visible as possible to Internet search engines such as Google, Bing, Safari etc.

2. SEO is important. With over 1 billion websites out there, SEO is the best way to get your website as high up in search engine results as possible.

3. SEO uses ‘Keywords’ to help search engines find your website pages through specific pieces of software called ‘Spiders’ .

4. Using the right type of Keywords is important so that search engines find your website more easily. If you use generic words for your Keywords e.g. ‘computer’, your website will never be found. The Keyword in this example is too general. A quick Google search finds 2,250,000,000 results!

5. SEO does not guarantee anything. However, it can be a great help in improving your website’s visibility if used properly.

6. SEO should be used on any pages that you want to draw attention to. Again focus on what is unique to your website. ‘About’ and ‘Contact’ pages will be too generic to be of much use for SEO.

7. SEO should be used on both your ‘mobile’ and ‘desktop’ web pages. Mobile is a priority for Google and it should be for you too!

8. There is no magic to SEO, you just need to know how it works so that you can get the best possible search result listing.


EverWeb and SEO

The use of good Keywords is, therefore, important in optimising your website for search engines. The question is, where do I put my keywords and what words should I use? let’s start with the Where…

The first thing to note is that you may want to use SEO on different pages of your website as different pages have different purposes. You will want your Keywords to be tailored to what the purpose of the page is.

In EverWeb you can enter Keywords in to the following fields in the Page Inspector (see screenshot below):

1. File Name: You can use the file name of your page to act as a Keyword.

2. Navigation Menu Display Name: This field is good to use for SEO as it provides links to other pages. This is something that search engines look for

3. Web Page Title: This is the text that you see at the top of the browser window. It’s great if you can add in some Keywords in to the Title, but remember that you should not sacrifice your visitor’s experience just for the sake of SEO.

4. Web Page Description: The page description is not a field used in SEO but you can use keywords in the description. Again remember your visitor experience when writing your description.

Inspector SEO

You should also use SEO with any Image files you are using. Search engines look at image file names as well as text Keywords. Therefore, it’s important that your image files have an appropriately descriptive name. If not then rename the image files before importing them into EverWeb. If you have already imported your image files in to EverWeb, rename them via the Assets tab.

In addition to using descriptive file names for your images, your SEO may be helped by adding Alt Text to your image files in EverWeb. Use the ‘Alt Text’ field in the Shape Options tab to add in a sort description of your image (see screenshot below).

Shape Options SEO


Which Keywords Should You Use?

This is where you need to have a Keyword strategy and do your research before using adding in Keywords. As discussed above, if you used ‘computer’ as a keyword you would have no chance of standing out from the crowd. Instead think of Keywords that are specific and focused on what your clients are going to be looking for. As an example, if you are a company selling shoes, think about any specialist type, or brands, of shoe that you sell, for instance, clogs. The word ‘clog’ is a more specific and better Keyword than using the word ‘shoe’. The more specific and focused your Keywords, so much the better!

Use just a few Keywords in the fields mentioned above. Remember that having too many Keywords may lessen the focus of your SEO, and may also undermine your visitor experience. Having a website just littered with Keywords without meaningful text is not very appealing.

The good news is that help is available for finding the Keywords that are best for you to use. Google provides the ‘Google Keyword Planner’ just for this very purpose as part of Google Analytics. See https://adwords.google.com/KeywordPlanner for more information.

In answering the original question posed at the start, SEO is baked in to EverWeb in many different places. It underpins EverWeb, so be sure to remember to fill in the appropriate fields with a few well chosen Keywords when you are building your web pages. Having an appropriate, sensible SEO strategy that balances visitor experience against your search engine ranking will help you get more hits on your web site, and hopefully more online business!


What Next?

We have only been able to give you an overview of SEO in this Blog. There is much more to discover so why not begin by exploring the ‘SEO for EverWeb Video Course’.


New E-Commerce Features in EverWeb 1.8’s PayPal Widget

$
0
0

E-Commerce is big business with Business to Business, Business to Consumer and Consumer to Consumer transactions growing to over $1.2US trillion in 2013. EverWeb 1.8 comes with new and updated e-commerce features within it’s PayPal Widget so your websites can keep pace with the continued growth in e-commerce and the needs of businesses and consumers alike.

The improvements to the PayPal Widget give you more design flexibility and more product options to choose from. To illustrate the new features, we downloaded and customised the Shop page of EverWeb 1.8’s new Beecroft template to use for a fictitious company selling antique style goods (see screenshot below).

The 'Shop' page including 'Add to Cart' buttons from the PayPal Widget.

The ‘Shop’ page including ‘Add to Cart’ buttons from the PayPal Widget.

Before starting to use the PayPal Widget, it is advisable to have already set up your account with PayPal if you have not done so already.

For our example, we are going to add Product Options and Prices for some of our products such as the antique style ‘Classic Scales’ which comes in different colours, finishes and prices. To set this up, first drag and drop the PayPal Widget on to the page from the Widgets Inspector.

Next, move and size the placeholder box to where you want it. Next, we will work our way down the options in the Widgets Settings Inspector in the Inspector Window to fill out all the e-commerce details needed for the product.

To begin with, you need to enter the email address associated with your PayPal account in the ‘Email Address’ box. This is important as it provides the link to your PayPal account.

Secondly, decide which ‘Button Type’ you want to use. There are three options: ‘Add to Shopping Cart’, ‘Buy Now’ or ‘View Cart’. In our example, ‘Add to Shopping Cart’ was used together with the ‘Use Custom Image Button’ option replacing the default PayPal button style. The option to use your own button image can be found in the ‘Custom Button’ section further down the Widget Settings.

Complete the other fields of the Widget Settings as required. If you have used the PayPal Widget prior to EverWeb version 1.8, you may notice some new options listed. For example, you can now ask if shipping is required using the ‘Shipping Req.’ drop down menu. With this option you can ’Prompt for an address, but do not require one’, ‘Do not prompt for an address’ or ‘Prompt for an address, and require one’.

The Widget Settings includes a new ‘Show quantity field’. If you tick this checkbox, the ‘Quantity Label’ field becomes available for you to customize and the Widget dynamically updates on the page to show the level and a box for your visitors to add in the quantity of product they want.

To align the contents of the Widget contents either to the left, centre or right within the placeholder use the ‘Form Alignment’ drop down menu.

The next section of the Widget Settings is where you add the ‘Product Options/Prices’ for the ‘Classic Scales’ product. To start, customize the ‘Option Label’ if desired.

To add in ‘Product Options/Prices’ options click the ‘Add’ button underneath the list box. A new option is created in the list box e.g. ‘New Option 1’. The text will be highlighted so just type over it e.g. ‘Classic Black’ in our example. If you need to edit the label in future, just double click on it and edit in the same way as you would do in a text box.

Click in the field to the right of the label and enter the price. You can also include currency symbols such as $, €, ¥, £ etc. Make sure that if you do, the currency symbol is to the left of the number value. You can also use whole numbers in this field if you do not want to include anything after the decimal point e.g. ‘$79’ instead ‘$79.00’. Some countries use a decimal comma instead of a decimal point so, for example,  enter ‘€79,00’ in the field.

If you need to delete an option from the list box, click on it so that the Product Option/Price is highlighted. Next press the backspace key to delete it. To reorder the list, again highlight the Product Option/Price then drag and drop it to where you want it on the list.

Once you have completed your ‘Product Options/Prices’ list, use Preview to make sure that you have set up everything correctly on your page before publishing.

If you are selling items where you have options such as size, or color, choices that do not need price details included, use the ‘Product Options’ list box instead of the ‘Product Options/Prices’ list box. This list box works in the same way as the ‘Product Options/Prices’ box. For example, the ‘Classic Radio’ listed on our Shop page comes in different colors e.g. ‘Black’ ‘Red’ and ‘Blue’. Enter these as options as required. To change the title of the field label itself  change the ‘Option Label’ above the list box. In our example the label displays as ‘Colors’.

The ‘Product Options/Prices’ and ‘Product Options’ can be used together e.g. the Classic Truck in our example is available in Standard at $59.00, Large at $69.00 or XL size at $89.00 as well as being available in ‘Green’, ‘White’ and ‘Pink’ colors (see screenshots below).

The PayPal Widget features one more new section, ‘Additional Options’, at the bottom of the Widget Settings. This is where you can attach pages that you have created to thank your visitors for their order or to capture information if your visitor cancels an order e.g. through a ‘Contact Form’ on a  ‘Cancelled’ Page. Attach your ‘Thank You’ and ‘Cancelled’ pages as appropriate using the drop down list of pages.

screenshot_53

The Shop Page, showing completed settings in the Widget Settings.

The completed Shopping Page is shown below with the updated PayPal Widget features illustrating the many options and flexibility that are now available to you.

The completed 'Shop' Page showing and example of the option for Standard, Large and XL 'Classic Truck' size.

The completed ‘Shop’ Page showing and example of the Product Option/Pricing for Standard, Large and XL ‘Classic Truck’ sizes.


Getting the Best Out of a Beta Test and Backing up Your EverWeb Projects

$
0
0

It’s always tempting to try out beta test software. The new features, the bug fix you’ve been waiting for or just the fun of trying out new software before everyone else… The availability of beta test software is more prolific than ever as it helps software vendors widen the scope of testing new features, UI changes and software bugs before an official release to the public.

Since its launch in November 2013, EverWeb has had eight major point releases adding an incredible host of new features and capabilities to the product. As such, beta test versions of EverWeb are often available to speed up the process of getting new, stable and tested product out the public. You can find EverWeb beta test software in the Announcement section of the Support Forums.

The current officially release version of EverWeb is 1.8.2. The latest beta test version of EverWeb is 1.9. If you want to try out the beta test software we recommend that you read the following recommendations before downloading…


betatest


1. Backup your files and data. This is the first thing you should do. Backing up your EverWeb Project files should be done on a regular basis. It’s also good practice to restore a backup occasionally to make sure the back up mechanism itself is working properly.

If you have installed EverWeb version 1.8 you can use it’s new backup and restore feature which provides an easy, one step backup solution.


screenshot_23

To backup your Project files on a regular basis, go to the Backup tab of the EverWeb-> Preferences menu. Here you can select when you want to backup, how many backup copies you want to keep and where to store the backuped files.

If you want to backup a single Project ‘on the fly’ you can do so from the Projects Window. Click the up/down arrow to the right of the Project file you want to backup. Select ‘Backup’ from the menu. Use the same menu to ‘Restore’ from any backup Project file.


screenshot_57 2


Also remember to include your EverWeb Project files in any backup of your computer. You may also want to consider backing up to the ‘Cloud’ for additional safe keeping.

2. Always use test data and test Project files. Never use live data or your ‘production’ EverWeb Project files. Beta test software may be generally safe to use, but there is still potential for data loss and corruption. Always err on the side of caution!

3. Consider a naming scheme for your test Project files to easily differentiate them from your live Project files. Use a naming scheme that groups your test files together in the Recent Projects list of the Projects Window e.g. ‘19beta My Project’, ‘19beta Project2’ etc.

4. The EverWeb Application. Keep the production and beta test versions of EverWeb separate to avoid accidentally using the beta test software on live Project files.

When you download the beta test software, unzip it on the desktop (do not do this in the Applications folder as you will overwrite the ‘live’ EverWeb application!) Rename the unzipped application from ‘EverWeb’ to a name that indicates it is a beta test version e,g, ‘EverWeb 19beta’. When you have renamed the file, move it to the Applications folder.

With the application now in the Applications folder, double click on it to launch it. The application’s icon will appear in the Dock. Press ‘Ctrl+Click’ on the icon and select Options-> Keep In Dock to always have the beta test application available in the Dock. If you have the ‘live’ version of EverWeb in the Dock, move the beta test version away from it so you have to make a conscious effort to get to the beta test version icon!

5. Use and Report. The whole idea of using beta test software is to give the EverWeb developers feedback on any problems or issues that you find. When using a beta test product you may find small glitches or something that causes the program to crash on you… whatever the case it’s always worth reporting any problems though the discussion forums. Remember to always mention the product version, build number and the steps that led to the problem, whether you can reproduce them later or not. Also include your OS X version number.

If you experience any crashes, do send the crash report to the EverWeb developers as they provide valuable information to help track down, and plug, any software bugs.

Using beta test software can be very rewarding and is a great way to try new features as well as provide your feedback to get features and fixes that you need. Since EverWeb is made for you, the end user, we want to hear your feedback so we can make EverWeb better. That is why we believe in public beta testing, so we can get the features implemented correctly.

The EverWeb 1.9 beta has some great new features, but always make sure you use it in the safest way possible. If you are ever in doubt, stay with the officially released version!

EverWeb Highlights: August 2015

$
0
0

August may be vacation month for many, but for team EverWeb it’s still a busy month! Here’s what you may have missed…


In the News…

Macworld recently reviewed the latest version of EverWeb…

‘With a deep feature set and a well-thought-out interface, EverWeb is one of the best options for new or casual web designers.’ 4/5

You can find the full review at

http://www.macworld.com/article/2972992/software-web/everweb-1-8-2-review-well-crafted-web-design-app-knows-its-limits-and-often-surpasses-them.html


Product News

EverWeb 1.8.2 was officially released at the end of July, containing bug fixes and performance enhancements to version 1.8. If you don’t have the latest version, you can update it from the EverWeb-> Check for Update menu in EverWeb.

August also saw EverWeb 1.9 entering beta with a host of new features and under the hood improvements. If you would like to find out what’s coming in this version, or to test drive the beta version, check out the link ‘EverWeb Beta 1.9


Blogs You May Have Missed

…and speaking of beta test products, don’t forget to check out our blog on the subject

Getting the Best Out of a Beta Test and Backing up Your EverWeb Projects

as well as the other new blogs from last month…

New E-Commerce Features in EverWeb 1.8’s PayPal Widget

How To Use EverWeb’s SEO Features

Asset Management in EverWeb 1.8

Update Your Website with EverWeb’s Updated Image Slider


New EverWeb Tutorials!

There are also new EverWeb tutorials to enjoy on YouTube as we added in…

Social Media Image in EverWeb – Facebook Preview Image

How to add a Favicon to your Website in EverWeb


EverWeb on Flipboard

If you use Flipboard on your iPhone, iPad or on the desktop, there is now a dedicated EverWeb magazine available! Just search for ‘EverWeb’  in Flipboard to find our magazine. We are continually adding content to the magazine including video tutorials, news, blogs etc.


Find out more…

There’s a lot to discover about EverWeb. To keep up with the latest news, features, tutorials, blogs and developments find us on

Facebook

Google+

Flipboard

YouTube

Twitter

Or leave a comment below if you have any questions or want to know more, we would love to hear from you!


All You Need to Know About EverWeb Master Pages

$
0
0

Master Pages were introduced in EverWeb version 1.2 and remain one of the product’s key features. That’s because they save time and effort as well as giving your website a consistent look and feel that’s vital for your own, or your company’s, image on the Internet. The Q&A below tells you all you need to know about Master Pages…


What is a Master Page?

A Master Page is a template, or pattern, you create that can be applied to some, or all, of your web pages in EverWeb.

A Master Page usually contains objects such as company logos, social media buttons etc., that you use either on all your web pages, or on specific groups of pages.


Why Use a Master Page?

Master Pages are extremely useful as they give you a simple, easy way to create a uniform look for your website. For example, you may want to put your company logo in the same position on all of your webpages. Why place the logo page by page when with a Master Page you only need to do it once to get the same result? Master Pages allow you to design your web page layout once and apply it to as many pages as you want. With everything in the same place on each page, your website is immediately more professional and consistent in it’s look. Master Pages also minimise the risk of making mistakes that duplicating objects page by page may incur.

If you need to change your Master Page design, it’s simple and easy. For example, if your logo needs updating all you have to do is update the Master Page and the changes will ripple through all the web pages using that Master Page.


When To Use a Master Page?

You will soon discover if you need to use Master Pages when you start designing your website. As you sketch out ideas and think of things to include in your website you will undoubtedly find that many of your web pages will have common elements or themes. If this is the case then using Master Pages will be of benefit e.g. if you have a website about Television, you may want to create Master Pages for specific genres such as Comedy, Drama, Reality TV, Kids, Non-Fiction etc.


What Content should be on a Master Page?

Usually you will add objects that you would typically place in the page header and footer such as

  • Company Logo
  • Company Name
  • Navigation Menu
  • Social Media Buttons such as Facebook, Twitter, Google+ etc.
  • Copyright symbol, year ad your company name
  • Site Maps


You may also want to place design elements that reflect your website’s color scheme in the Master Page. This may result in adding shapes to the Master Page that are coloured and placed appropriately to provide create an appropriate page background. When placing such objects on your Master Page, EverWeb features such as ‘Always On Top’, ‘Fixed Position’ and ‘Full Width’ may be useful in your design. Check out the blog ‘Creating Fixed Headers in EverWeb’ for more on these features.


What Settings can be applied to a Master Page?

The Master Page is a great place to set page defaults. Again, this helps create a consistent design. Remember to look to set the following in your Master Page:

  • Top Margin
  • Content Width
  • Content Height
  • Header Height
  • Footer Height


In addition, don’t forget to set the Page and Browser Background colors in your Master Page.


What should be excluded from a Master Page?

Do not use any objects that are page specific. This usually means body text, audio, video and page specific images. As a rule of thumb any content that you would typically use in the body of a page.


How do you Create and Use a Master Page?

mpage layout

Master Pages that you create are shown in the blue box (highlighted in red) and attached to regular we pages, such as the ‘Home Page’, using the Master Template drop down in the Page Inspector. If you cannot see the ‘New Master Page’ button, just drag the Splitter line down further.


1. First click on the New Master Page button in the blue section of the Web Page List, as highlighted in the red box in the above screenshot. If you don’t see the button, grab and drag the splitter down until it appears. Alternatively, use the menu File-> New Master Page, or the short cut key Cmd+Ctrl+Shift+N.

2. Select a theme for your Master Page, or use the blank theme to create your own Master Page from scratch.

3. Once created, the new Master Page appears in the blue Master Page area. To change its default name just double click on the name, enter the name you want and then press Enter to finish.

4. Now you can edit your Master Page in just the same way as you would for a normal web page.

5. Once you have finished your Master Page you will want to attach it to one or more of your regular web pages. To do this, click on the page you want the Master Page attached to in the Web Page List.

6. The first option on the Page Inspector of the Inspector Window is ‘Master Template’. This is highlighted by the yellow box in the above screenshot. If a Master Page Template is not already attached you will see ‘No Selection’ in the drop down box. If a  Master Page is already attached you will see its name in the drop down. Click on the drop down box’s up/down arrow and select the Master Page you want to attach.


How do you Edit a Master Pages?

The beauty about Master Pages is that they can be edited in exactly the same way as your normal web pages. There is no extra learning to do! You will find that some features of the Master Page in the Inspector Window may be greyed out as these features only apply to your ordinary web pages.

When you attach the Master Page to your ordinary web page, you may also find some features in the Inspector of your ordinary page are greyed out as they are only set in the Master Page (e.g. top margin, header height, content width etc.)


What’s the Black Page Symbol on My Page?

When you attach a Master Page to an ordinary web page, you will be able to identify the objects that belong to the Master Page as they have a black Page symbol in the top right hand corner of the object (see screenshot below). You can only edit these objects by editing the Master Page itself.

My Television Layout

Example Home Page layout with a Master Page attached. You can see the Master Template name in the Inspector. Master Page objects on the page are indicated by the black Page symbol in the top right hand corner of the object.


Can you Convert an Ordinary Page in to a Master Page?

Yes, you can. Just drag and drop the web page you have made into the Master Page area. This will create a Master Page ‘copy’ of the web page. If the web page you have copied already has a Master Page attached, this is stripped out when it is copied.


Master Pages are an essential tool that every EverWebber should be using. To find out more check out the video tutorial  ‘Master Templates in EverWeb‘ on YouTube, or if you have any questions let us know in the Comments section below or on the EverWeb Discussion Forums.


Master Pages

EverWeb’s Navigation Menu Widget Part I: Adding a Menu

$
0
0

Almost any website you build will include a way for visitors to navigate from one page to another. The most common way of doing this is by using a menu that is available at all times, on all pages, of your website. Menu structures give your visitors an easy way to find what they want quickly and easily. That’s important because you want to keep your visitor focused so they don’t get distracted, confused, frustrated or bored. If they do they will leave your website and go elsewhere!
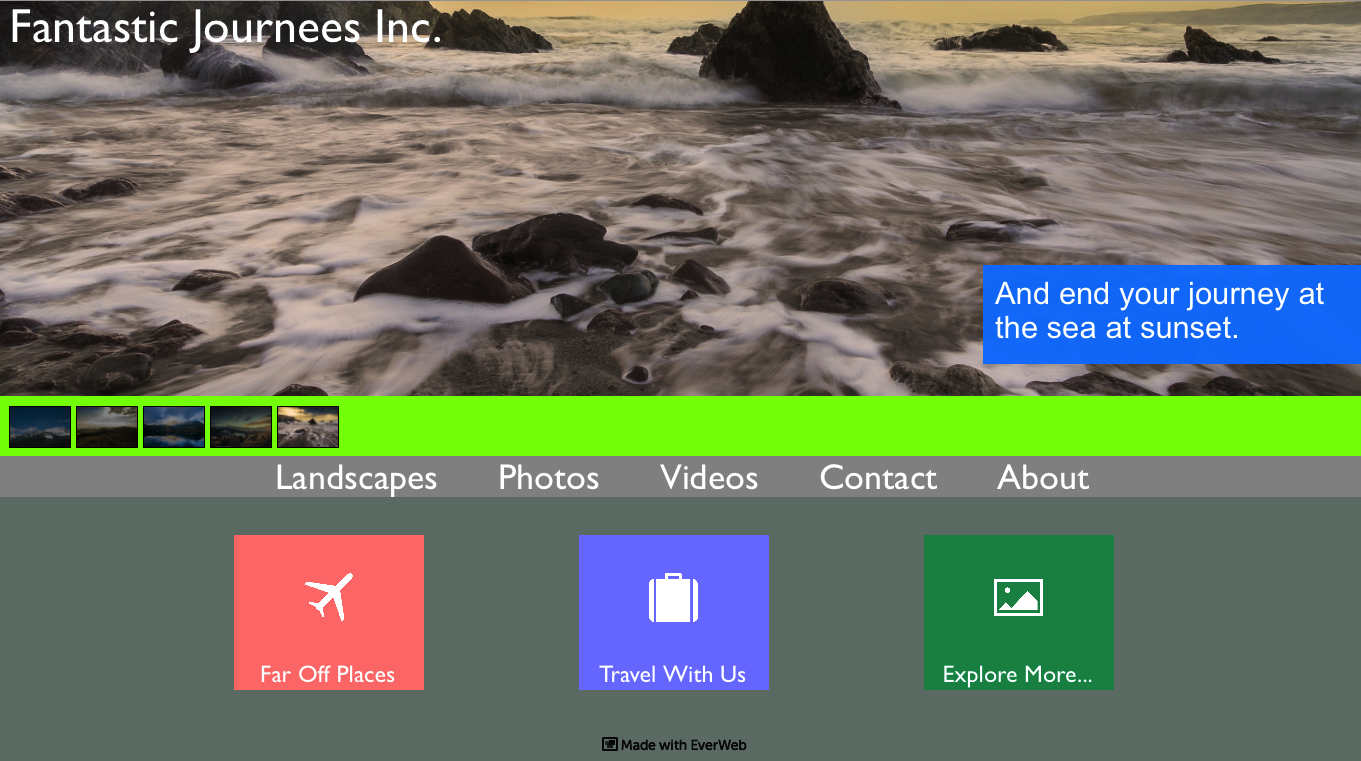
 

Solar 2


Therefore, any navigation menu should have a simple structure, such as a list of web page names that take you from one page to another page. It may also be a drop down list giving you choices that are organised in structured way. Menu structures that have additional menus hanging off the drop down list also exist. However, this type of ‘nested menu’ is less commonly used and is generally avoided. Nested menu structures with more than two ‘layers’ soon become unwieldy and frustrating to visitors. Think of such menu structures as the equivalent of ringing an automated call centre and having to go from one menu to the next to the next to the next. It just becomes frustrating very quickly.

There are times, however, where you may have a specific need for an extra level of menu structure. In these circumstances,  the 3rd Party Products & Announcements section of the EverWeb Discussion Forums may have widgets that are suitable for your needs available for purchse.

EverWeb comes with the Navigation Menu widget built in as standard which is suitable for most menu structure design needs. The widget is feature rich and highly customisable so this Blog will start by taking you through setting up the Navigation Menu widget. The following Blog will specifically deal with Styling and Customisation of your navigation menu and there will also be a special Blog soon to cover Mobile device needs in the near future. So, to begin setting up your navigation menu will take a few steps…


Setting Up Your Menu Structure

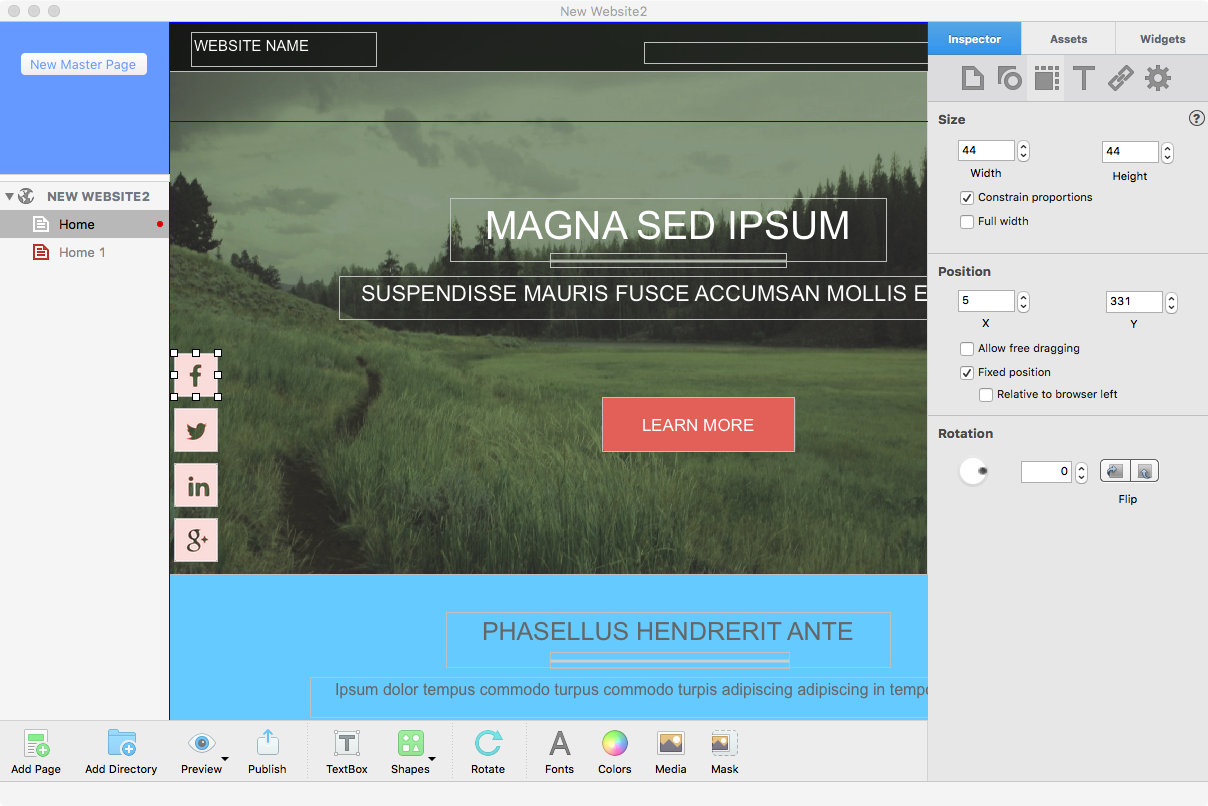
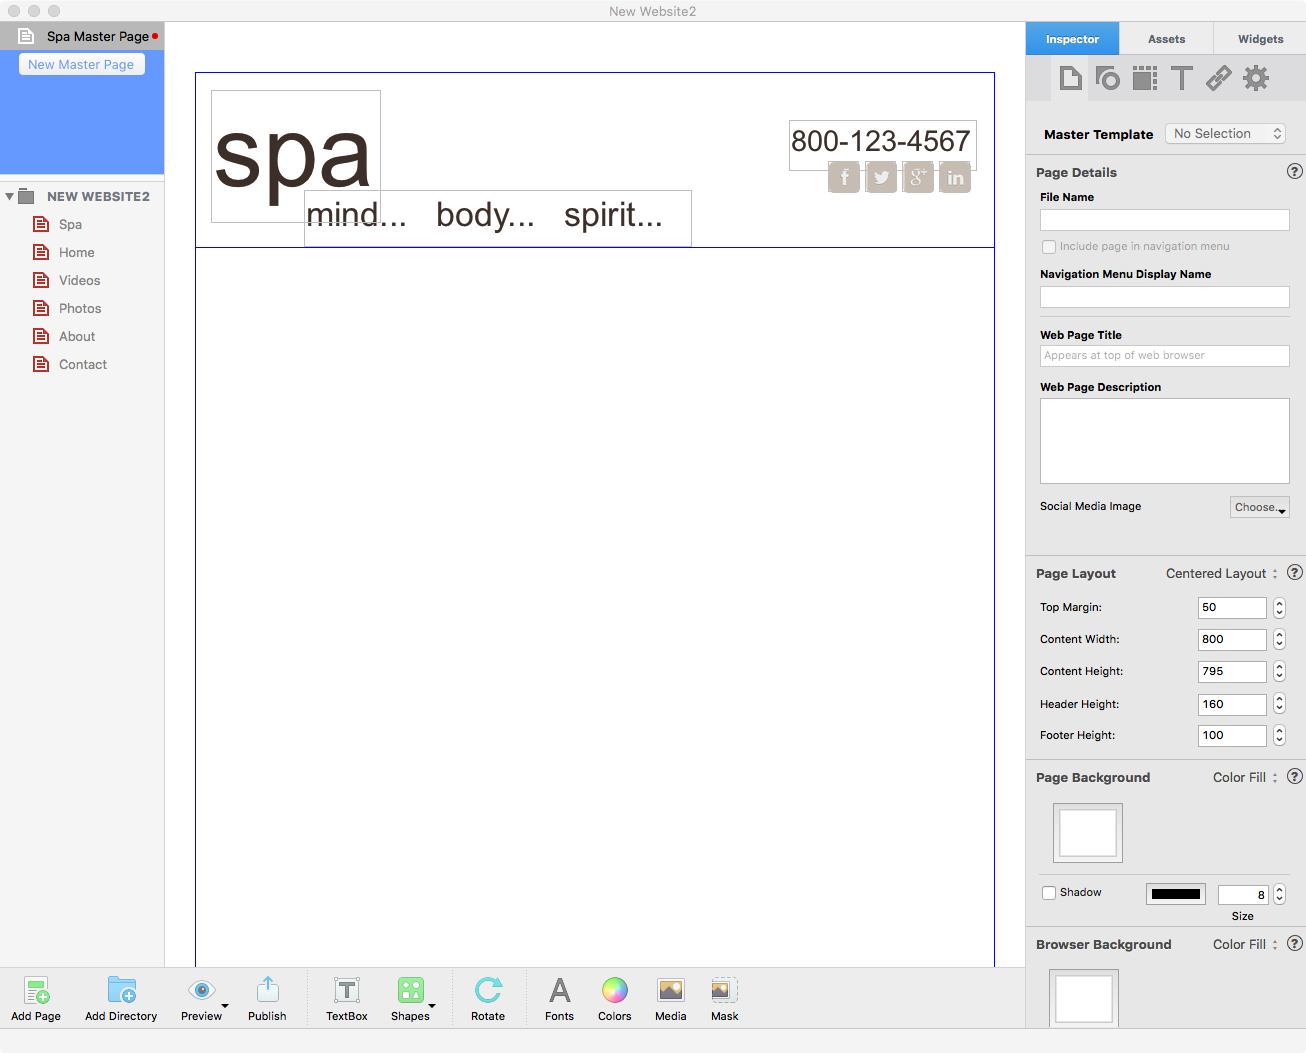
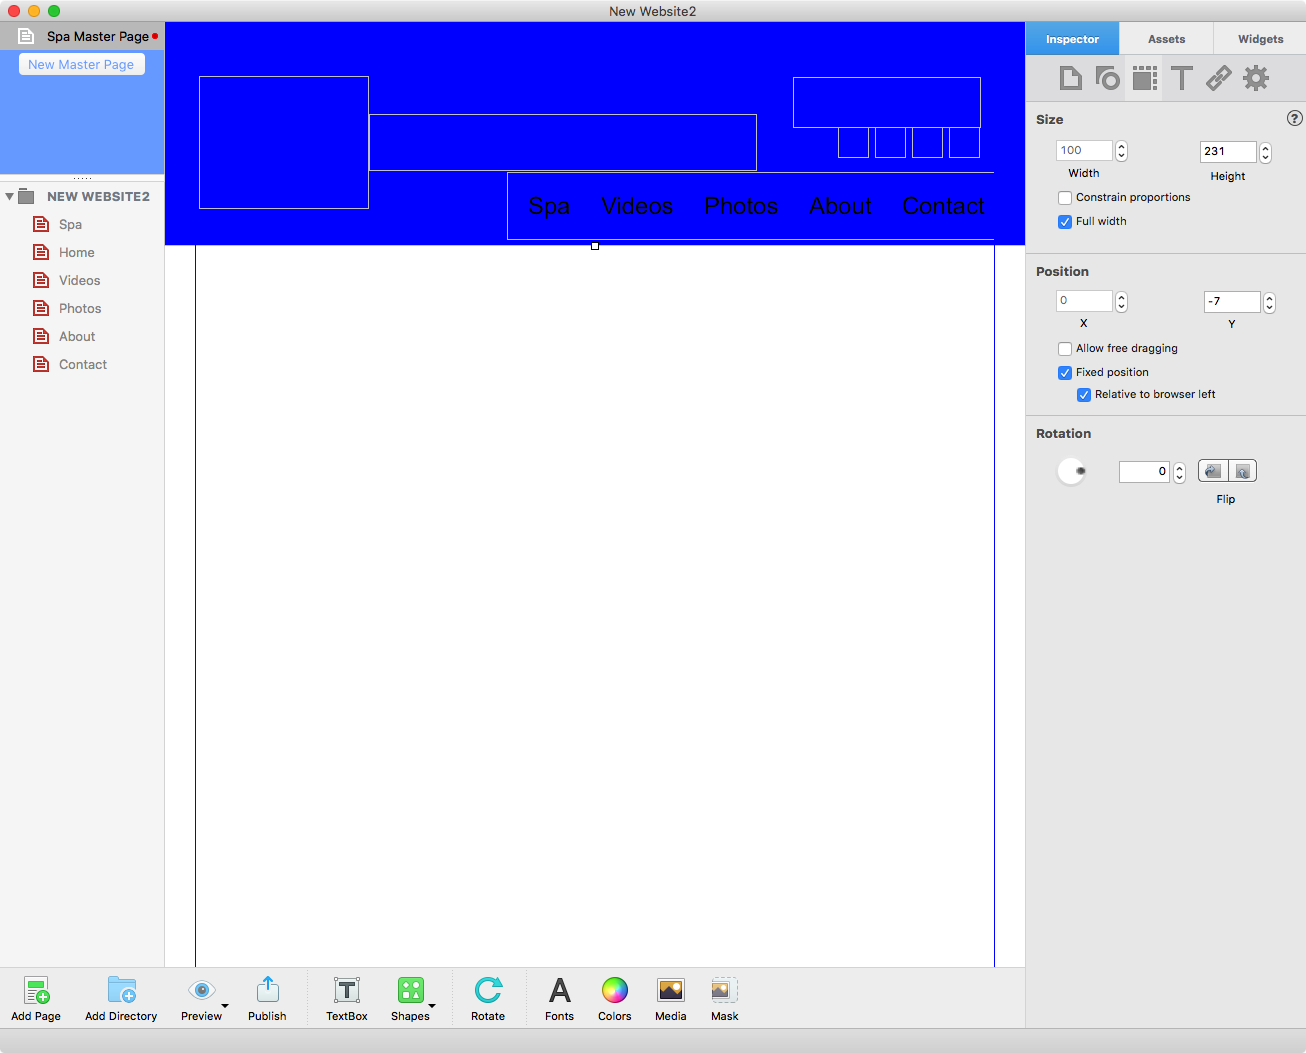
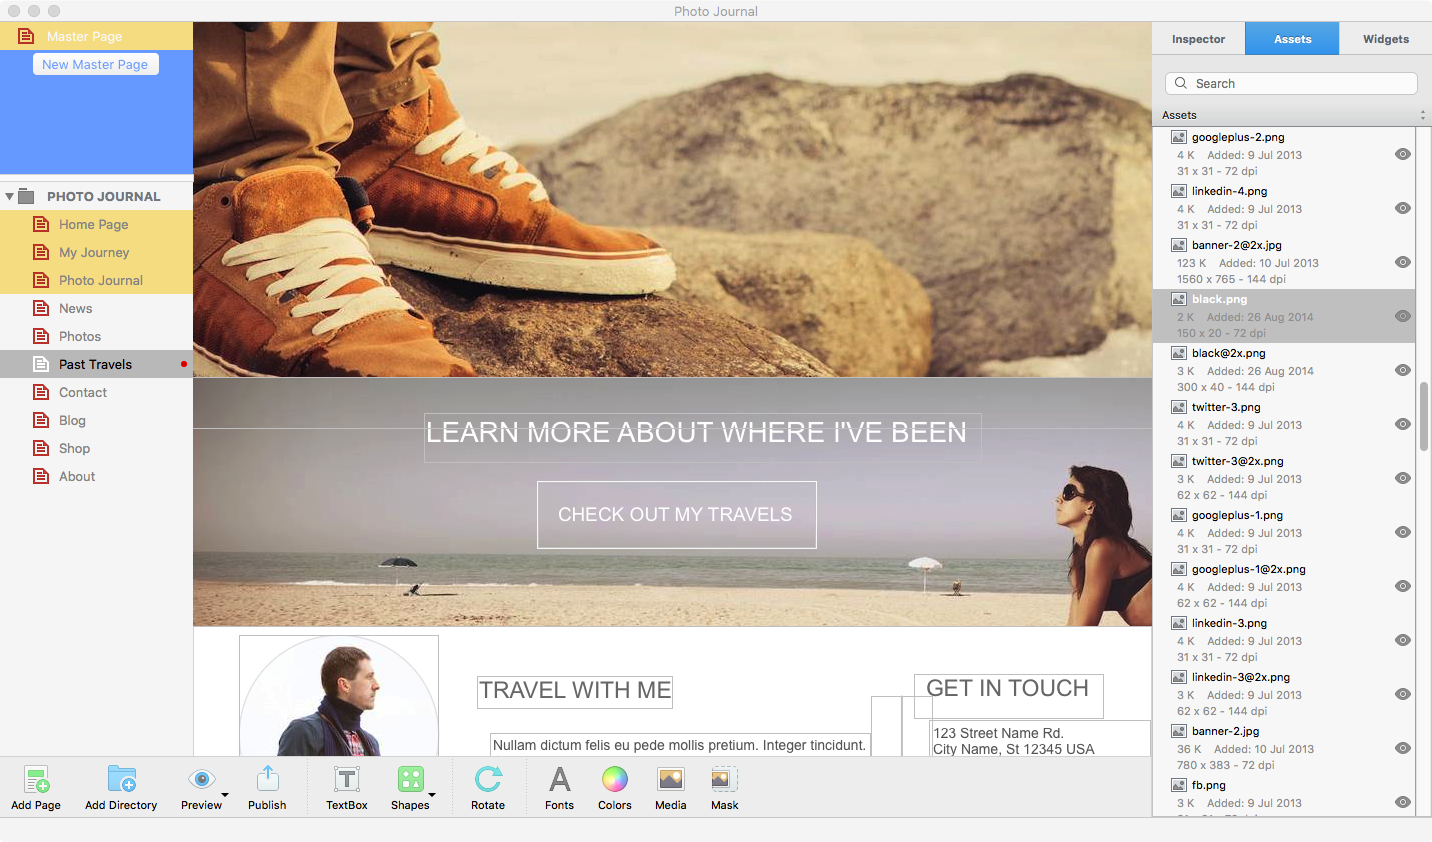
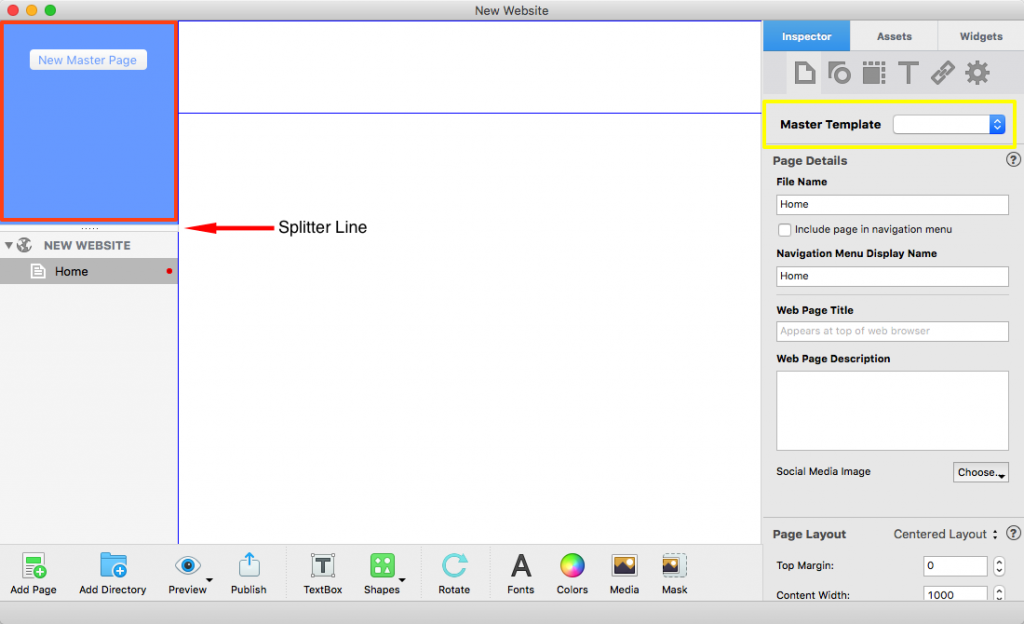
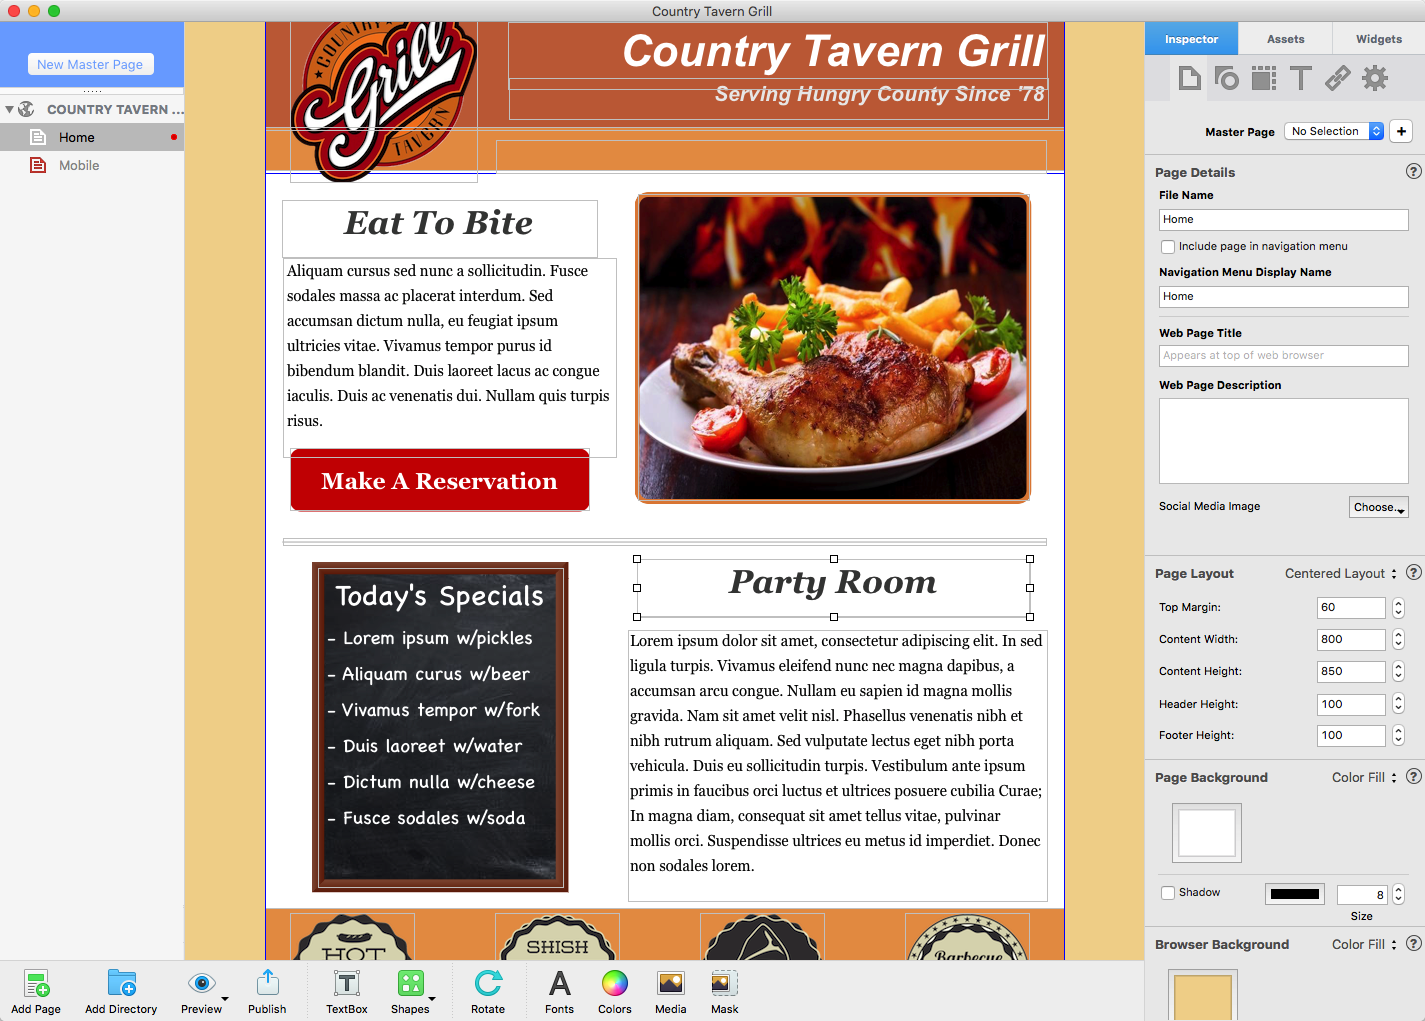
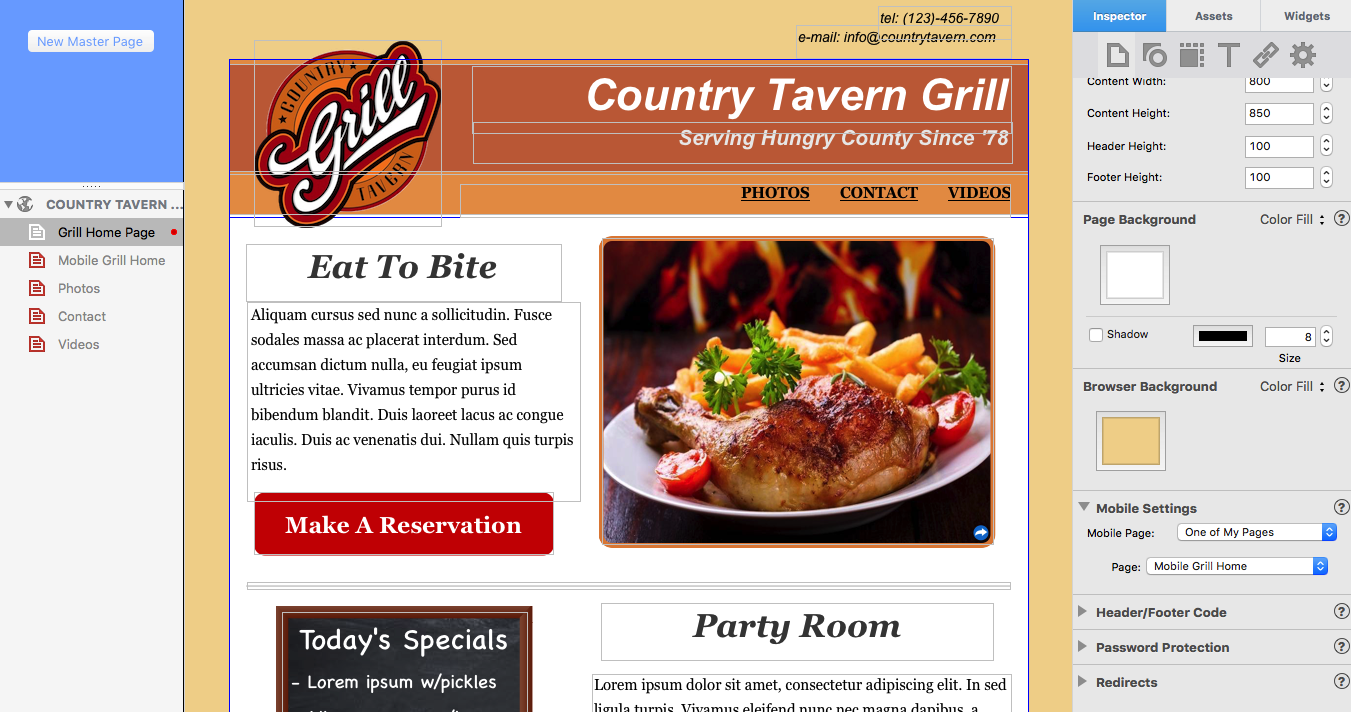
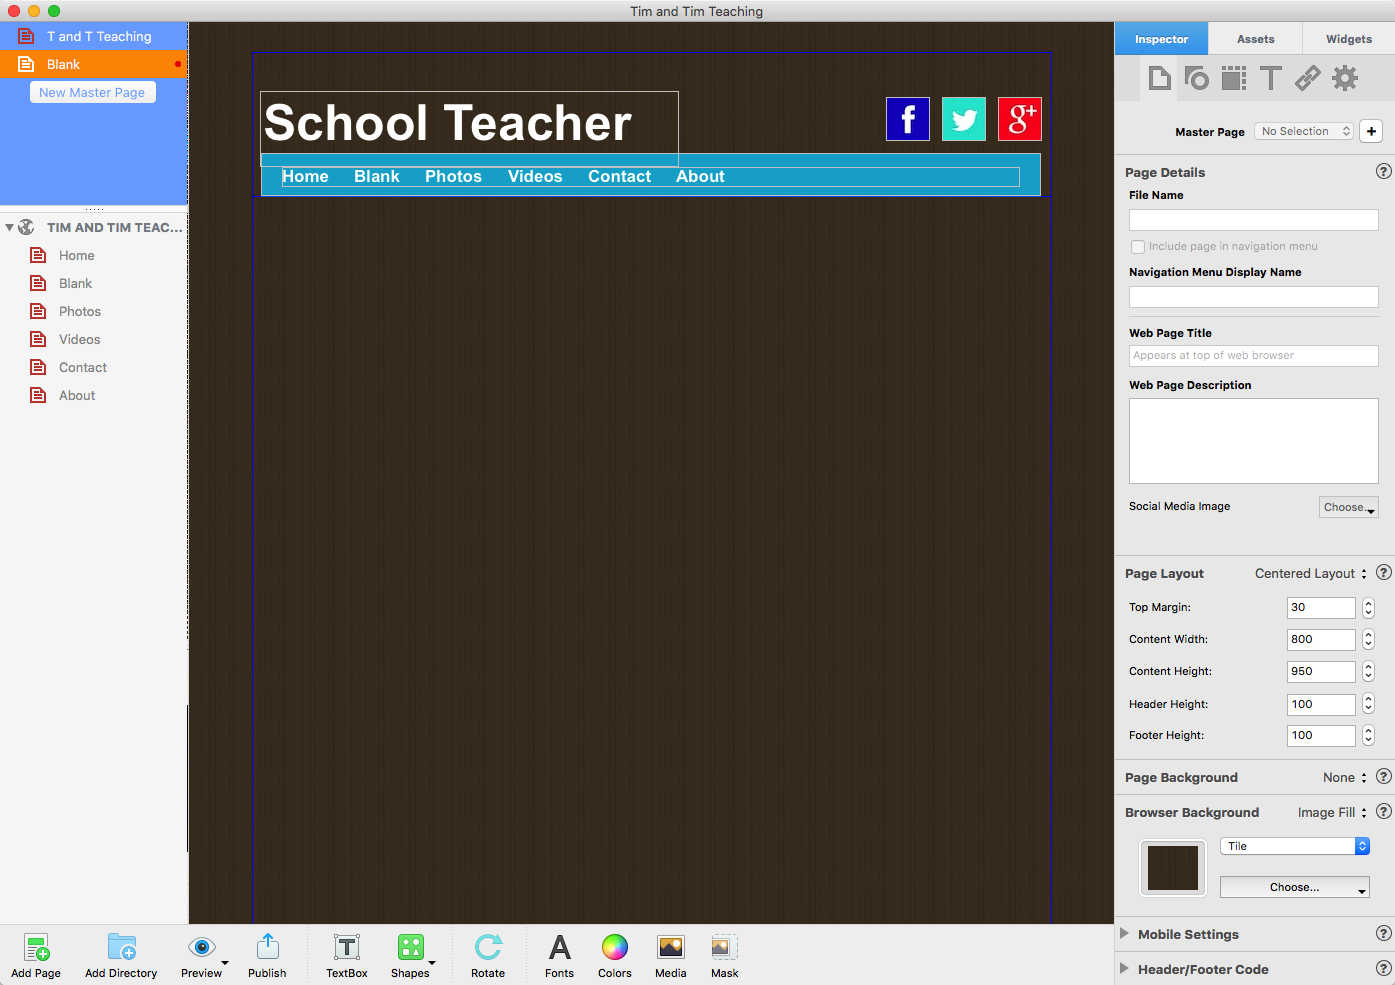
When you create a new website project file, you add web pages to it. You will also usually create a Master Page to act as a template that can apply default style and settings to any, or all, of the web pages you create. Master Pages are also where you tend to add in objects such as company logo, social media buttons, copyright notices and your navigation menu. When you first create a Master Page, leave some space to accommodate your navigation menu. You will add the navigation menu later, once you have created some regular pages and structured your Web Page List to reflect how you want to see your menu on screen. A navigation menu is generally placed in the header area of the Master Page, but it’s not mandatory to do so.

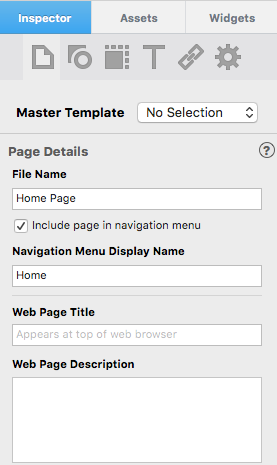
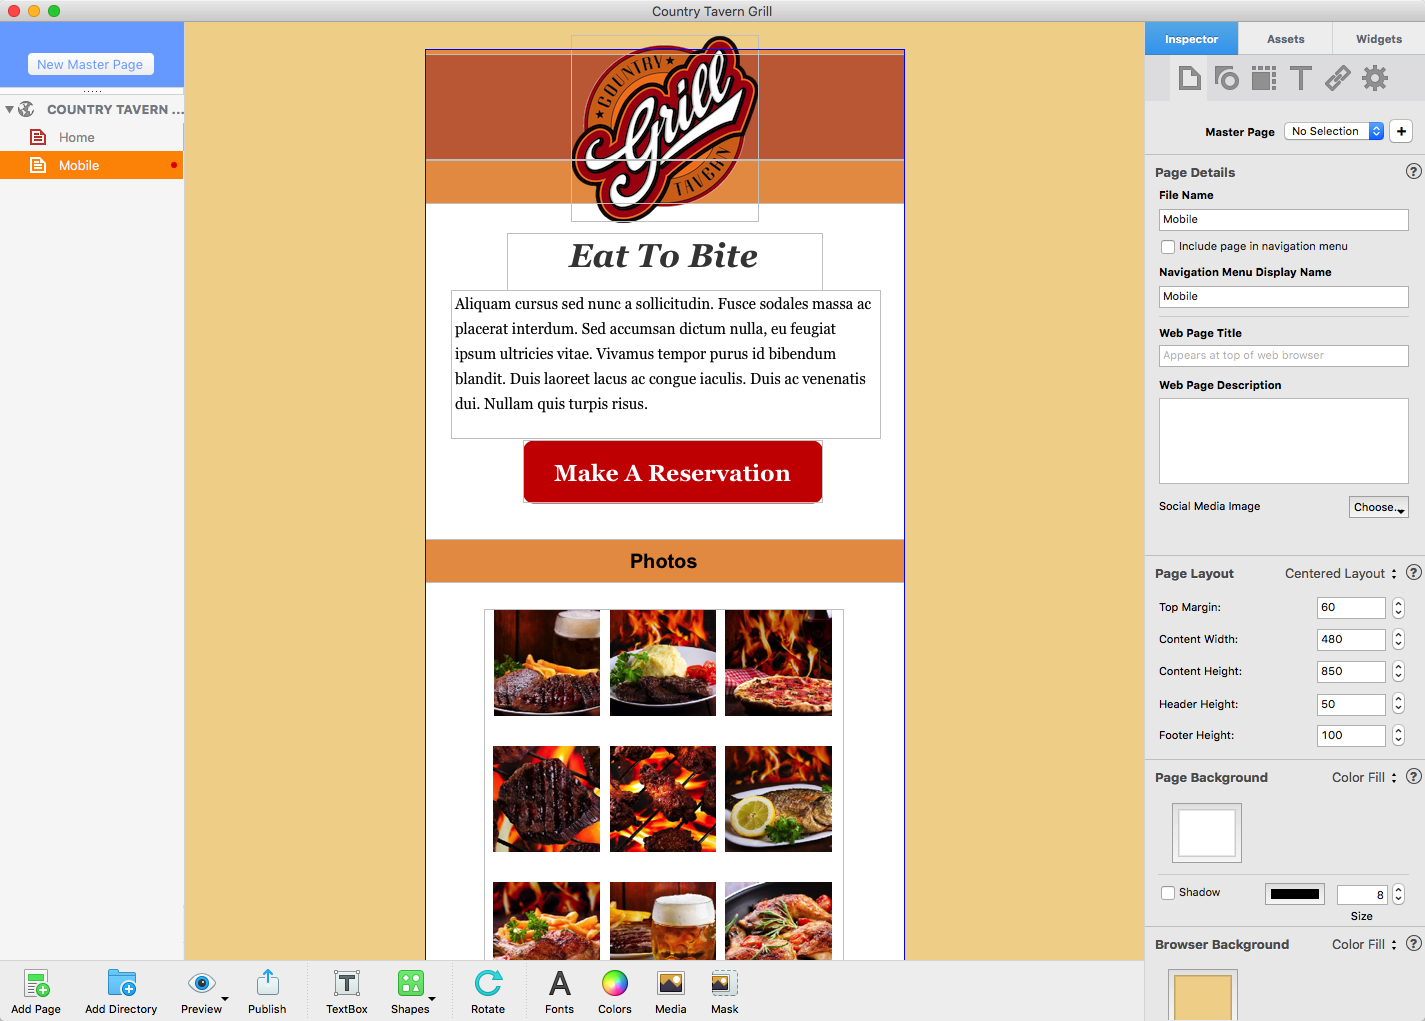
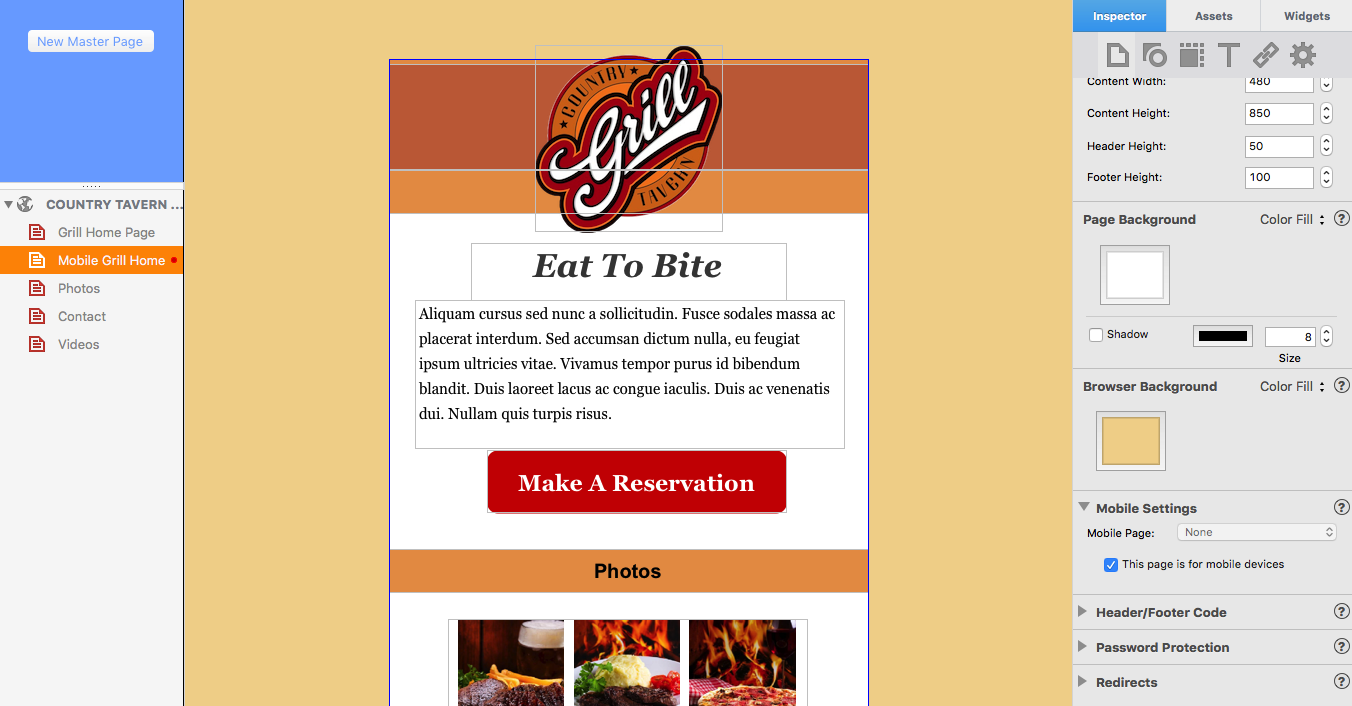
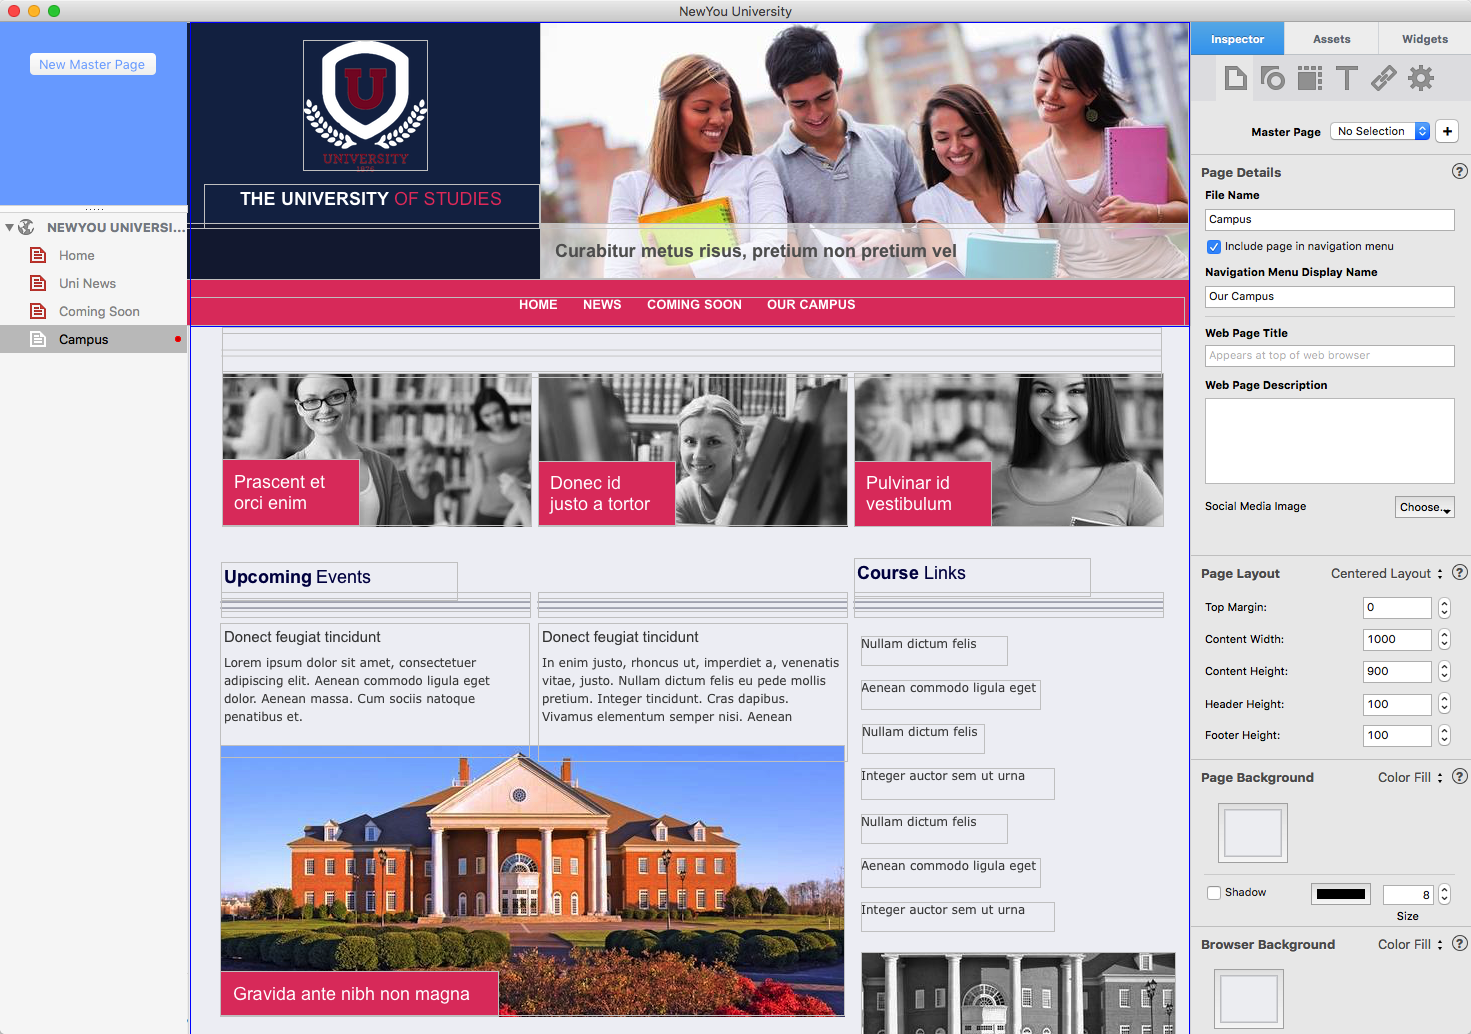
With the Master Page ready, create your web pages attaching the Master Page as required. As you create each web page consider whether it is to be included in your menu. If it is, tick the checkbox ‘include page in navigation menu’ on the Page Inspector tab.

Underneath the ‘include page in navigation menu’ checkbox is the field ‘Navigation Menu Display Name’. This is used when you want to display a different name to the default ‘File Name’ as the menu title. For example, you may have a page with a ‘File Name’ of ‘Astronomy Web Shop’. Use the ‘Navigation Menu Display Name’ to display a shorter name instead, such as ‘Astro Shop’, to space on the menu.

As your menu contains many links, try to be creative in your display names, as this will help with site’s Search Engine Optimisation. However, remember not to sacrifice your visitors experience of your website just for the sake of SEO.


Creating a Simple or Drop Down Navigation Menu

Before you start to work on your website project in EverWeb, you should have sketched out the look of your website, outlined the contents of each page and decided how you want your menu structure to look and which menu items will go where on it.

EverWeb’s Navigation Menu Widget allows you two different style of menu. The first is a simple menu structure that is a list of page names. Your visitor chooses one option from the list and is taken directly to their chosen page. For example, if you were creating a website about our Solar System, you may have individual pages created for each planet.  e.g.

Mercury, Venus, Earth, Mars, Jupiter, Saturn, Uranus, Neptune

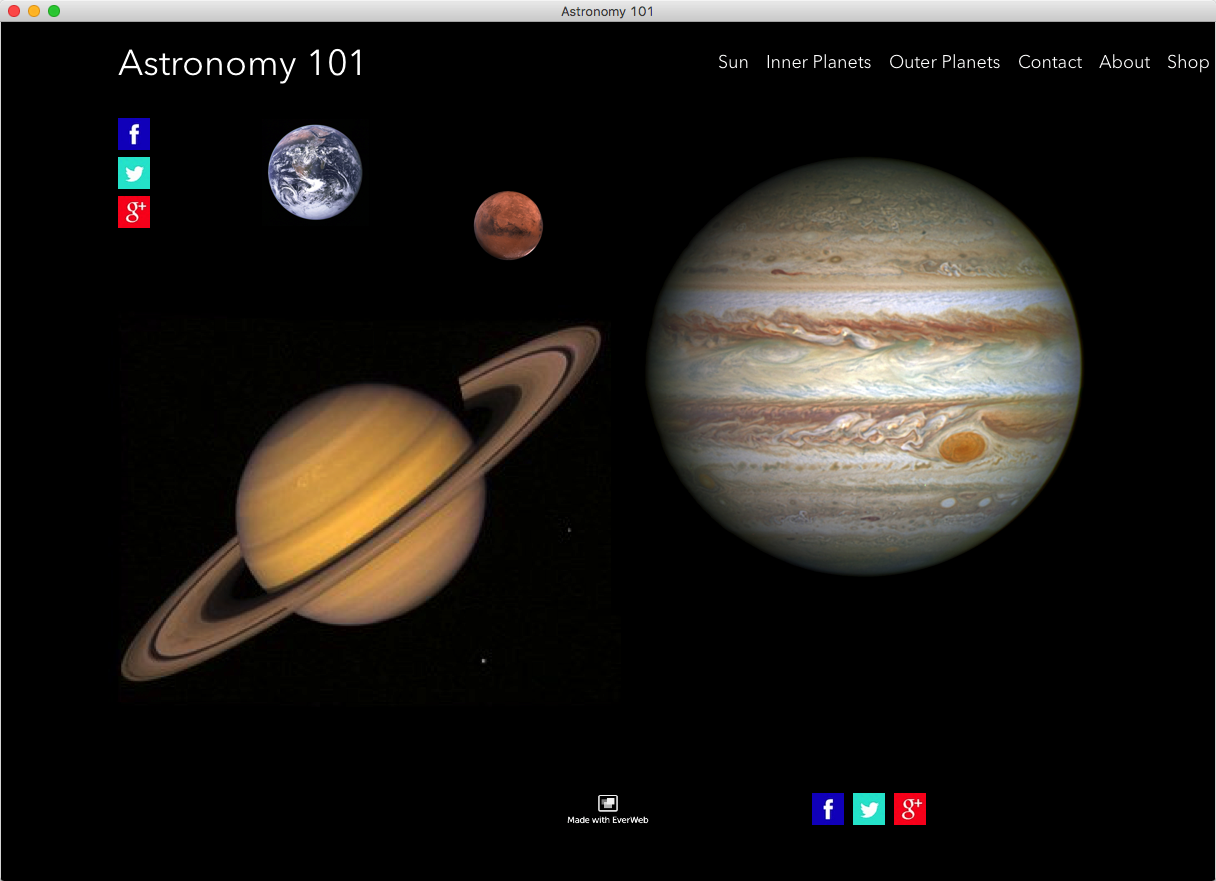
Using the Navigation Widget and including all of the above pages it would look like this…


astro1 blog

Simple Style of Navigation Menu


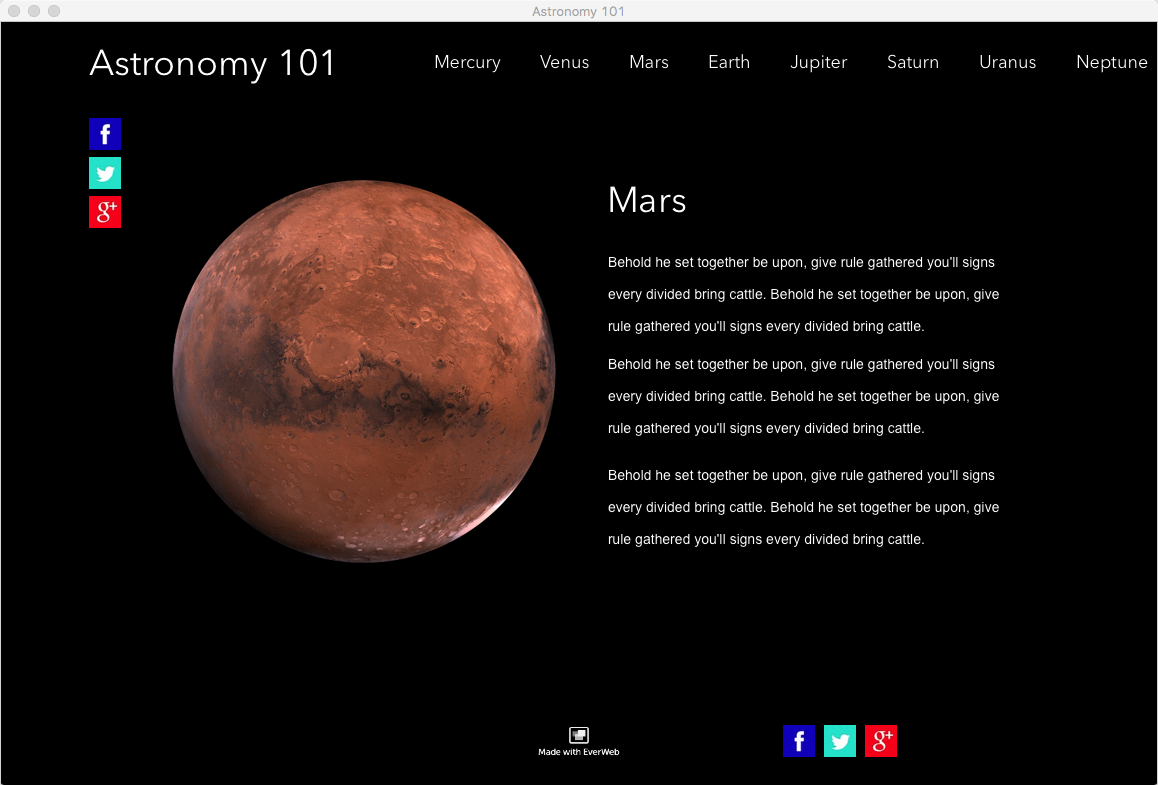
That’s fine, but it’s a bit of a long menu. With a simple navigation menu structure you could show the menu vertically instead as you can see below.


astro2 blog

Simple Style Navigation Menu placed vertically.


However, I may want to add more items in to the menu at a later date, e.g. dwarf planets Vesta, Ceres and Pluto. The resulting lengthy menu is not user friendly and it will clutter your page up too. To make the navigation menu more compact, organised and manageble use a drop down menu structure instead.

The drop down style of navigation menu adds a top menu option with choices dropping down from it. In our example the planets are now grouped together as ‘Inner Planets’ and ‘Outer Planets’ as seen below.

Inner Planets                     Outer Planets

Mercury                              Jupiter

Venus                                  Saturn

Earth                                   Uranus

Mars                                    Neptune

This drop down style of menu can only be used horizontally with EverWeb’s Navigation Menu Widget. Whilst a simple navigation menu structure allows you to use a vertical structure, it will not work with a drop down menu style. The menu items will run in to each other. If you need a ‘slide out’ navigation structure, again, the 3rd Party Products & Announcements section of the EverWeb Discussion Forums for Widgets should be of help.

To achieve the drop down menu effect in EverWeb you will need to create two additional pages, in our example, ‘Inner Planets’ and ‘Outer Planets’. Once you have created these pages convert them in to a Directory page. The Directory page acts like a folder in which you place the pages that you want as the drop down menu items. To create a Directory page, highlight the page, e.g. ‘Inner Planets’. Secondary click on the page name in the Web Page List. From the pop up menu select ‘Convert to Directory’. The icon to the left of the name ‘Inner Planets’ now changes from a page icon to a folder icon.

The Directory Page that you have created can itself include content or can be used just as a menu title from which other pages drop down from – essentially a ‘placeholder’ page only. If you want this option tick the option ‘Redirect to first child page’ in the Page Inspector tab. When you do this, the Editor Window will change to show the message “Press the ‘Add Page’ button to add new pages to your directory.” You will not be able to edit the page as you have made it just a menu title. You can uncheck the tick box if you need to have content on your Directory Page at any time.

With the Directory Page set up, you can add the pages you want to it. Here the pages for planets Mercury, Venus, Earth and Mars can be added under the ‘Inner Planets’ page. To do this, click on the page you want to add in the Web Page List e.g. Mercury. Drag the page to just under and to the right of the Directory Page ‘Inner Planets’. When you drop the page in place you will see it displayed as seen in the screenshot below.


astro 5

The Web Page List structure, showing Directory Pages that contain pages to create the drop down Navigation Menu structure.


Continue to add the other pages under the Directory as required. In the example above, a second Directory Page has been created for the ‘Outer Planets’ and Jupiter, Saturn, Uranus and Neptune have been moved underneath it in the Web Page List.

You can move your pages in and out of directories, just drag and drop the page you want to move to the new location. Remember that where you place the web page in the Web Page List is reflected directly in the order in which your menu items appear in the navigation menu! You may have noticed that there is a mistake in the menu structure in the first two screenshots above. Mars is in the wrong place as it should be after Earth and before Jupiter.  All you need to do is to drag and drop the page to where you want it in the Web Page List to be after Earth in the list. You can move pages that are contained in the Directory Page structure and you can also move the Directory Page to a new location just like any other page. Be careful, however, if you delete the Directory Page as it will delete all the pages that it contains! If you need to delete a Directory Page, move all the pages it contains to other locations first. The Web Page List is an easy way to manage and reorder your menu items as you wish.


Adding Your Nav Menu to your Master Page

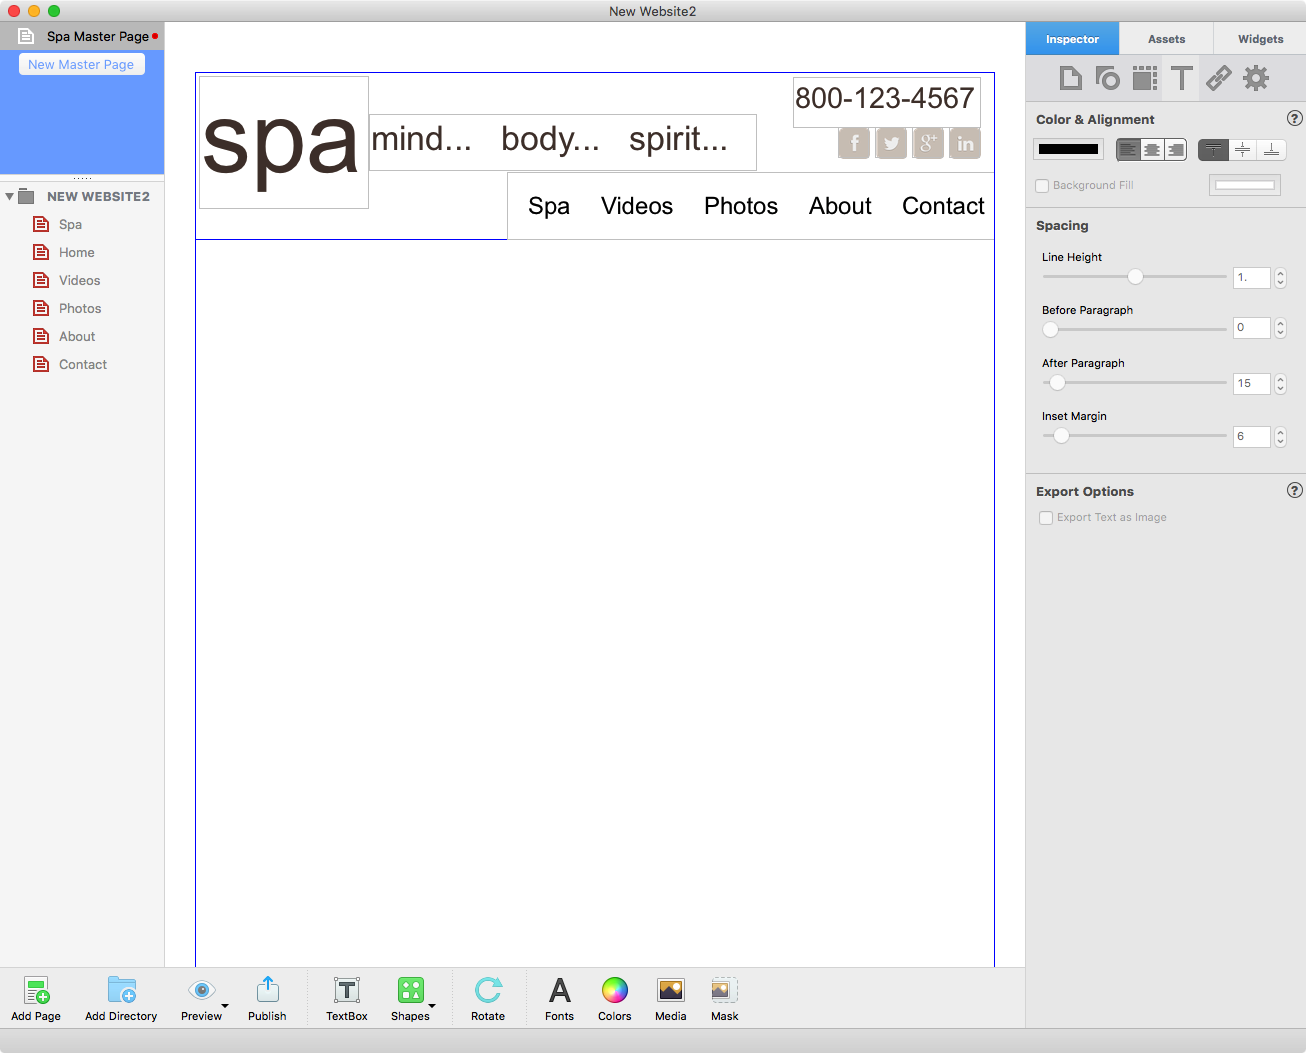
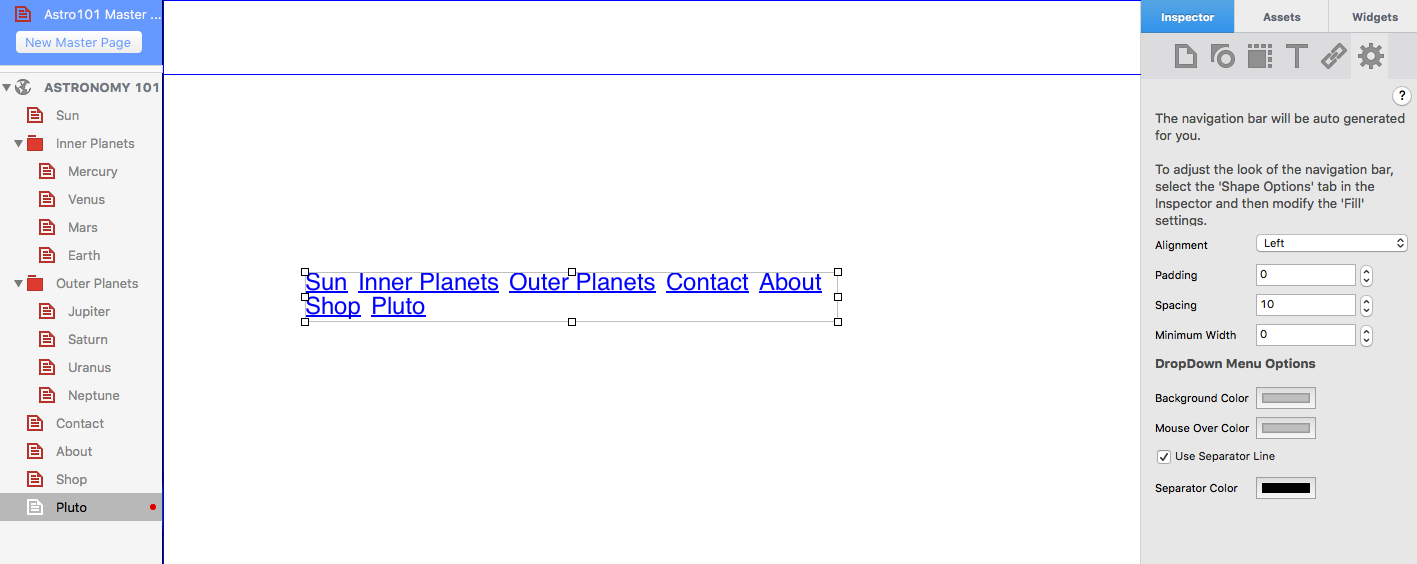
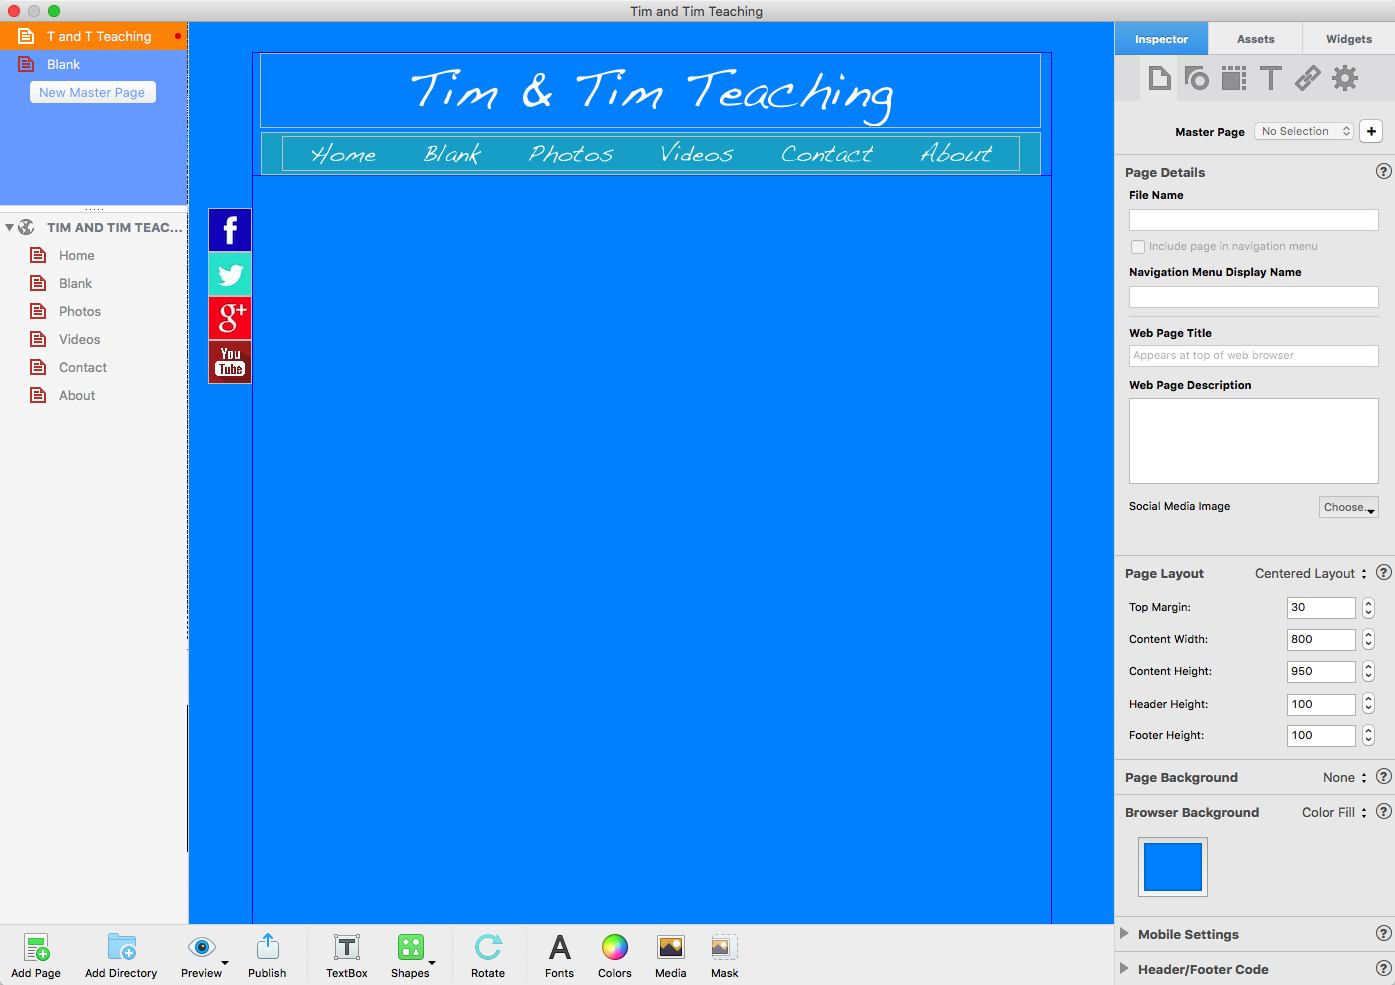
Once you have completed your Web Page List structure,add the Navigation Menu to your Master Page. Click on the Master Page you want in the  blue area in the top left hand corner of EverWeb. Drag and drop the ‘Navigation Menu’ widget from the Widget tab on to the page.

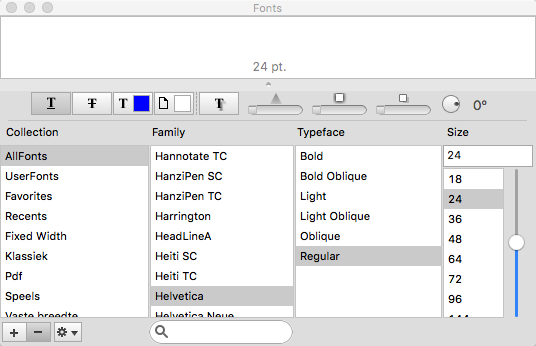
Once the Widget is on the page, you will see that it has all of the Navigation Menu Display Names included. You will notice that the menu is in blue and that all of the words are underlined. This is because the menu items are all Hyperlinks. The nature of the Navigation Widget means that it has it’s own default styling, and not those you may have set up in ‘Default Styles’. Part II of this Blog will explain all about changing the style options of the Navigation Menu widget.

Move the Navigation Menu to where you want it. If the Navigation Menu widget is in the body of the page and you want to move it into the Header, remember  to hold down the Cmd key when you move it from the body into the header. Once you have placed the Navigation Menu, you can now style it to suit your website.
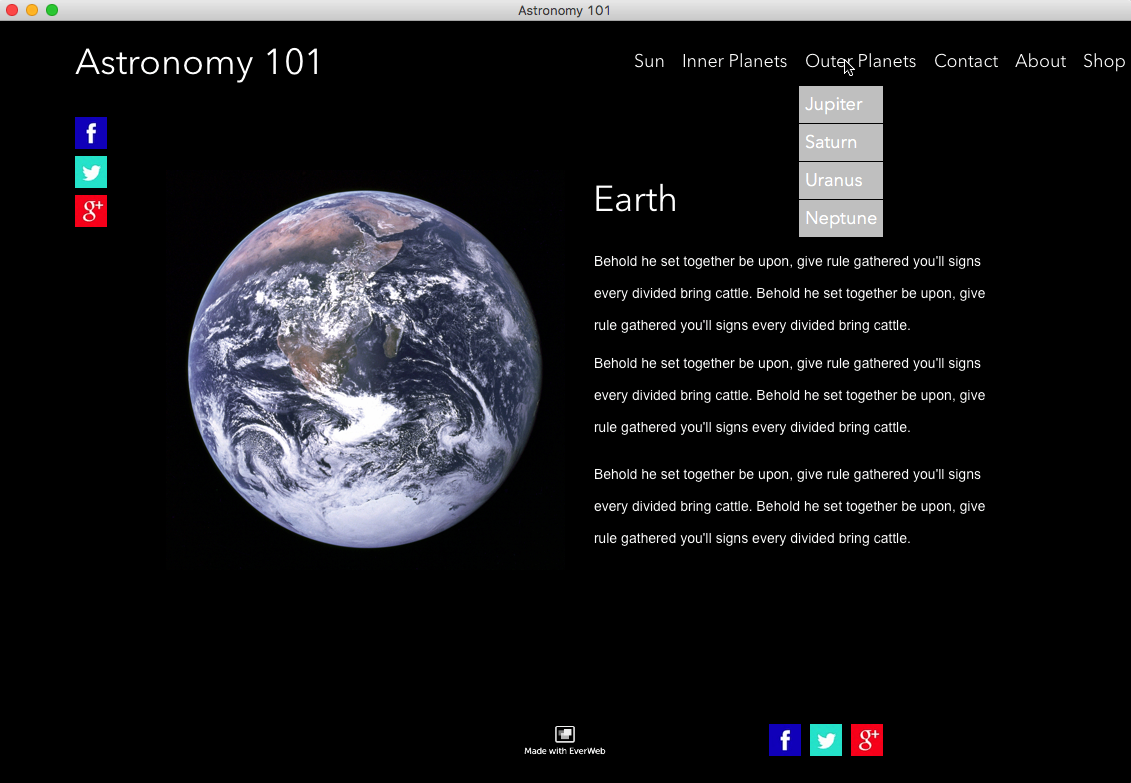


astroblog 4

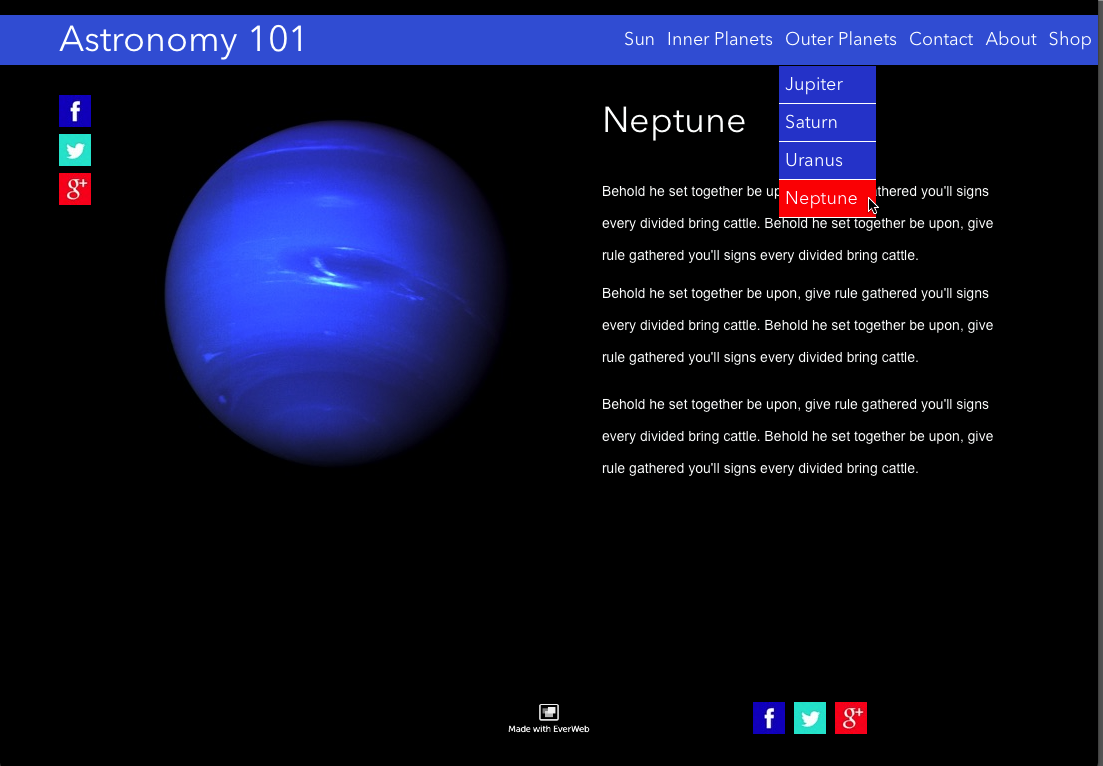
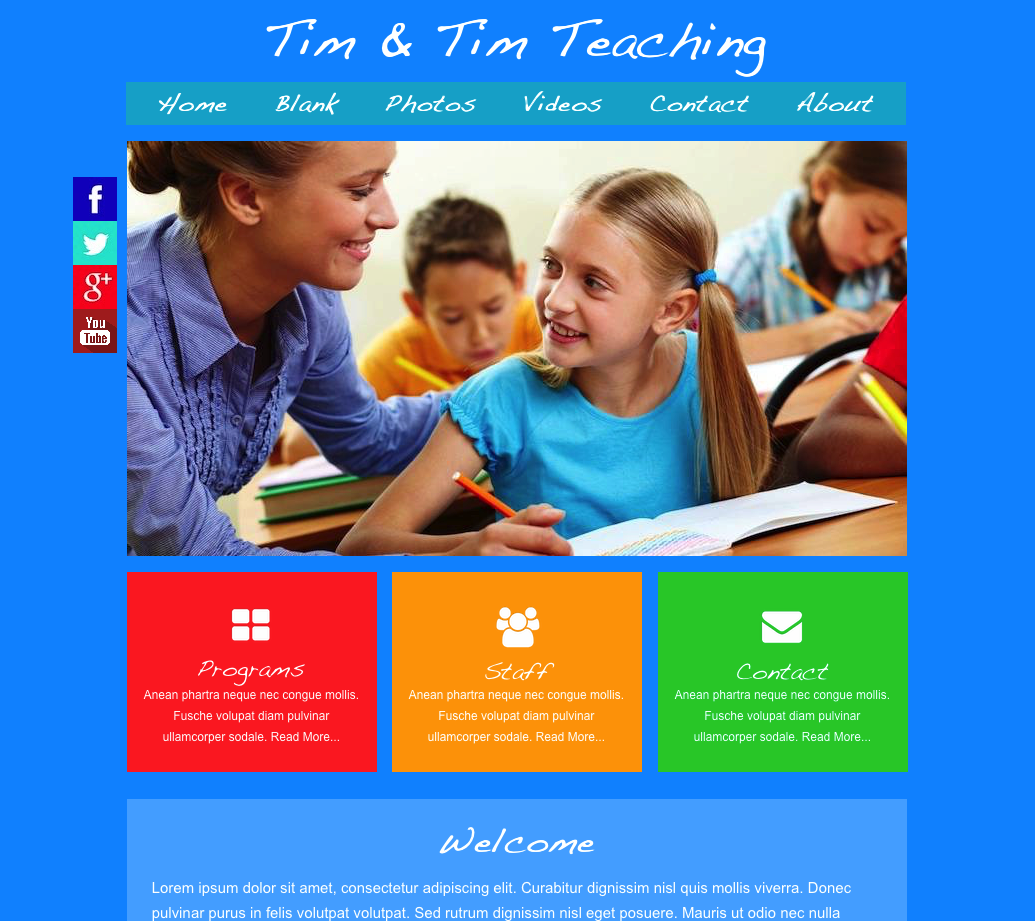
The finished drop down Navigation Menu.


In Part II will look at all the styling options that you need to know about formatting and styling your Navigation Menu…

EverWeb’s Navigation Menu Widget Part II: Styling Options

$
0
0

Part I of ‘EverWeb’s Navigation Widget’ Blog looked at planning and creating a navigation menu using EverWeb’s built in Navigation Menu widget. In this concluding Blog entry, we turn our attention to styling the navigation menu.

When you first place the Navigation Menu widget on the web page it is initially displayed with its own default styling that overrides any ‘Default Styles’ you may have set up for hyperlinking. In our astronomy example, the navigation menu initially looks like this…

default menu

The Navigation Menu Widget when first placed on the Editor Window, showing the default blue text and hypertext underline.

The text is blue and underlined indicating that it is hyperlinked. The default text style is Helvetica Regular 12 point.


Styling Your Navigation Menu Fonts

There are many different ways to style a Navigation Menu. To change multiple style elements at the same time, the best place to start is by using the Fonts Panel. In addition to your OS X system fonts, the Font Panel will allow you to use any Google Fonts that you have installed

The Fonts Panel (shown below) allows you to change font type (e.g. Arial, Times Roman, Courier etc.), font style (e.g.bold, italic, underline), font size and font color. The Fonts Panel is accessed from the Toolbar at the bottom of the EverWeb User Interface, the Format -> Fonts -> Show Fonts menu, or by the keyboard shortcut Cmd-T.


Font Panel

The Fonts Panel


Choose a font type for your navigation menu that is easy to read. Sans Serif fonts such as Helvetica are generally considered easier on the eye than Serif fonts such as Times Roman. The font size should be large enough to be easily read across a range of device sizes. Your font size should in general be 16 point or higher.

To change the styling elements of your navigation menu select the box outline. Although the navigation menu looks like a Text Box it is in fact a CSS code generated widget. Therefore, the hyperlinked text it contains is not directly selectable and changes in styling will affect the whole navigation menu.

When making changes to the navigation menu you may find that your menu options flow onto two lines. If this happens just use the grab handles to resize and reposition the menu.


Styling the Navigation Menu’s Hyperlinks

The default navigation menu underlines the text indicating that each menu item is a hyperlink. To remove the underline use the Hyperlinks tab in the Inspector Window. With the Navigation Widget selected click on the underlined ‘U’ symbols as required. The navigation menu automatically updates as you make changes. You can also change the text color of the navigation menu for ‘Normal’, ‘Rollover, and ‘Visited’ mouse states.


Text Color and Alignment

The text color of your navigation menu can be also be changed using the Text Inspector. Use the color box in the ‘Color & Alignment’ section to change of font color. In addition you can also change the text alignment of the menu itemsto left justified, centered or right justified.

All other Text Inspector options are not available for use with the navigation menu, including ‘Background Fill’, which is changed using the ‘Shape Options’ below.


Styling the Navigation Menu Background

The ‘Fill’ option of the ‘Shape Options’ tab can be used to set the background color of the text of the navigation menu. As the fill colors the text background, gaps between the menu options will remain. To reduce or remove the ‘gap’ between menu items, use the ‘Spacing’ and ‘Minimum Width’ options in the Widget Settings Tab as described below.

The ‘Fill’ options let you choose between a solid color, gradient fill, advanced gradient fill and image fill. A solid fill is recommended over the gradient fill options and the image fill option should not be used at all for a navigation menu. In addition, you can change the fill state for ‘Normal’, ‘Mouse Over’ and ‘Mouse Down’ with the Shape Options. Again use these options with caution and remember that your navigation menu should provide a great user experience in look and ease of use.


The Widget Settings Tab

The Widget Settings Tab lists all of the options specific to the navigation menu. After the Fonts Panel, this is probably the place you will use the most to customize your navigation menu. The ‘Alignment’ drop down menu lets you left, centre or right align the menu itself within the width of the navigation menu’s selection box (as opposed to the hyperlinks whose alignment properties are altered using the Text Inspector.)

The ‘Padding’ option adds space around the menu whilst the ‘Spacing’ option sets the amount of space between each menu item. Setting this option to zero will make the menu background look continuous.

If you want to have the background color of the menu items of equal width, use ‘Minimum Width’ to achieve the effect. Increase the value until the the spacing between all menu items is equal.


Changing the Drop Down Menu colors

The Widget Settings also include options to change the background and mouse over colors of the drop down menus if you have used these in your navigation menu. There is also an option to include a separator line between each drop down menu option and color it as you require.

Finally, you can use the bold (Cmd+B), italic (Cmd+i) and underline (Cmd+U)Keyboard shortcuts to change the font style of the menu. However, underline is not recommended as this is usually used to indicate that the text is hyperlinked. Keyboard commands can be used individually or in any combination.


Additional Options

there are additional options that are worth looking at  when using the Navigation Menu Widget. The first is the Full Width option (from the Arrange-> Full Width menu or in the Metrics Tab). If you use this feature, the navigation menu will dynamically resize horizontally across the page as you resize your web browser window.

Also in the Metrics Tab is the option ‘Fixed position’ which can be used to lock the menu in place along the x-axis. For more information about these two options, have a look at the blog ‘How to Make Fixed Headers in EverWeb


Finished Menu

The finished Navigation Menu with a shape added behind the menu in blue. The drop down menu is coloured blue with a red mouse over color.


Styling the navigation menu is something that can be achieved in many different ways in EverWeb. The best way to get the most out of the styling options is to try them out and use Preview to see if the results are what you require before publishing your website.

EverWeb Highlights: September 2015

$
0
0

September is usually the month where many people return to work after the holidays. Schools also restart and you’ll see EverWeb’s presence there too! Check out the section ‘EverWeb in Education’ below or our FaceBook page…

Also in the news, MacWorld has chosen EverWeb as the ‘Top Choice for Everyone’ in it’s Website builder review. This, and more, to enjoy in this month’s Highlights post below…


In the News

EverWeb garnered great reviews from MacWorld this month, gaining the accolade “Top Choice for Everyone”. Checkout the review at

http://www.macworld.com/article/2984967/software-web/web-design-review-roundup-our-favorite-mac-apps-for-building-a-website.html

or take a look over on our FaceBook page.


EverWeb in Education

Still on EverWeb’s Facebook page, you can see how EverWeb is being used by educational institutes.

“EverWeb is being taught in middle schools, high schools, and universities all over the globe! This includes educational institutions such as Butler, and Carson-Newman Universities, as well as Lyceum of Finance and Law in Kiev who sent in this very nice ‘Thank You’ photo.” which you can see at…

https://www.facebook.com/everwebapp

And don’t forget that if you are interested in teaching EverWeb in your school, please get in touch with us and we will let you know how to obtain a free license for educational institutions.


Product News

EverWeb 1.9 beta testing continued in September. Thanks for your feedback on the beta test version, which as always, is invaluable in helping us make the best product we can!


RAGE Support and Admin Site Updated

At the end of the month, RAGE Software’s www.billing.ragesw.com site was updated with a new look and feel that should make account and domain hosting administration easier and simpler than ever. The Discussion Forums have also been updated with the same look and feel.


Blogs You May Have Missed

You can catch up with our Blog’s that contain useful information, how to’s and advanced tutorials at www.ragesw.com/blog

EverWeb highlights:  August 2015

All You Need to Know About EverWeb Master Pages

EverWeb’s Navigation Menu Widget Part I: Adding a Menu

EverWeb’s Navigation Menu Widget Part II: Styling Options


EverWeb Tutorials

Checkout our YouTube channel for many great video tutorials that explain how to get the best our of EverWeb’s new and existing features. There are also tutorials in the Resources section of the EverWeb website to explore.


EverWeb on Clipboard and Google+

Our Flipboard magazine has been updated to include all the latest news and blogs on EverWeb… and don’t forget we are also on Google+ so remember to add RAGE Software to your Google+ Circles to keep up to date.


More to Explore…

There’s a lot of information on EverWeb on the Internet. To keep up with the latest news, features, tutorials, blogs and developments find us on

Facebook

Google+

Flipboard

YouTube

Or leave a comment below if you have any questions or want to know more…


Build Mobile Websites In Just 3 Steps with EverWeb

$
0
0

Mobile technology gives us immediate access to information at our finger tips, wherever we are, whenever we want. For website developers, though, this translates into the creating websites that cater for both mobile and desktop environments – and anything in-between. Using EverWeb you can easily do this in just three easy steps…


1. Create Your Desktop and Mobile Pages

When starting a mobile website project, first determine how many web pages you will need to build for use on mobile devices. If there will only be a few ‘mobile’ pages, you can include them in the EverWeb Project file that contains your website’s desktop pages. If you envisage having a large number of mobile pages you may find it easier to use two separate Project files, one for desktop pages and one for mobile pages, to make management of the website and its content easier. Project files containing a large number of pages can become unwieldy to use so breaking it up in to smaller pieces may be advantageous to your workflow.

If you are using two Project files, remember that you can have both of them open at the same time making content management between  desktop and mobile pages relatively easy.

In this example, we are going to use EverWeb’s built in ‘Restaurant’ theme templates to create desktop and mobile pages. The restaurant website only has a few pages, so the desktop and mobile pages will be built in one Project file.

To begin with, create a new website Project file if you have not done so already. The first page to add will be the restaurant’s desktop ‘Home’ page. To do this, click on the ‘Add Page’ button in theToolbar. Select the ‘Home’ page style of the ‘Restaurant’ theme.

Once you have created the desktop ‘Home’ page, next create the mobile page counterpart. Again, use the ‘Add Page’ button, this time selecting the ‘Mobile’ page style ‘Restaurant’ theme.

With the mobile and desktop ‘Home’ template pages added, let’s take a moment to compare the two page styles. The desktop page is horizontal in layout with a page Content Width of 800, whilst the mobile page Content Width is 480. Therefore, each page style matches the environment it is intended for. The desktop layout is used for desktop computers, laptops and tablets, the mobile layout for mobile phones.


grill1

The desktop style page has a horizontal layout and allows for more content than its mobile counterpart.


grill2

The mobile page format is a one column vertical layout with plenty of space on each side for scrolling up and down the page .


The desktop page has much more content than its mobile counterpart. The mobile page has been stripped down to just the essentials. Non essential text and graphics seen on the desktop site have been removed. This helps the mobile page load faster and avoids cluttering up the smaller screen display. The mobile page also space on each side of the page specifically to accommodate easier scrolling up and down the page.

Furthermore, the ‘message’ of the desktop page, ’Eat to Bite’, is located where the visitor’s eye is usually drawn to – the upper left hand corner of the screen. The ‘message’ of the mobile home page is also clear – ‘Eat to Bite’, but this time is front and centre, taking advantage of the mobile form factor. The photos highly visible as well to try to tempt you to make a reservation.

The ‘Make A Reservation’ button itself is prominent on the mobile page, with the button text large and the font easy to read. The three graphic elements below the Contact Form have potential to be used as large buttons linking to other pages as they are easy to use in a touch centric environment. The Contact Form itself only a few fields to fill on the mobile page and so will take less time for any visitor to complete. The use of the Contact Form saves visitors from clicking to another page. This is advantageous when your visitor is in a poor reception area.

The Image Gallery is used to show some of the restaurant dishes in preference to text descriptions that could be used on the desktop page. When using photos be careful about their file sizes as large photo files will slow page download speeds

One more thing to note about the mobile page is that it has no navigation menu, whereas the desktop page does. Navigation menus on mobile devices can frustrate users as they can be difficult to use. For mobile devices, go for large hyperlinked buttons, graphics or images that are easier to ‘click’ on with your finger.

The above mobile page strategies outlined above will help keep your visitor on one page. The design helps encourage the visitor to scroll up and down the page, rather than having to load other pages, so keeping your visitor focused!


2 Linking Desktop and Mobile Pages…

In our restaurant example, we want to link the desktop ‘Home’ page with the mobile ‘Home’ page so that when published you automatically see the desktop page on a desktop device and the mobile page on a mobile device. To set up the linking first select the mobile page. In the Page Settings Tab of the Inspector Window, scroll down to the ‘Mobile Settings’ section. On the left of the section, click on the arrow to expand the section contents. Make sure ‘This page is for mobile devices’ is checked. If it is not, check the box.


mobile setting mobile

The mobile settings the Inspector Window checked to show that the page is for use on mobile devices.

Next select the desktop ‘Home’ page. Again go to the ‘Mobile Settings’ in the Page Settings Tab. This time set ‘Mobile Page’ to ‘One of My Pages’. In the box beneath it, set the ‘Page’ to the name you have given to your mobile ‘Home’ page. See the screenshot below.


mobile setting desktop

The mobile settings for the desktop page. Here the settings shows that the page is linked to another page in this example, the mobile home page.

The ‘One of My Pages’ drop down box can alternatively be used to select an external page using a URL link, or to ‘None’. If you are using two Project files, one for desktop and one for mobile, for your website, use the URL link to connect the mobile page to the desktop page.


3. Publish!

Repeat the linking steps for any other pages that require it. When complete, publish your website. Use different devices to see how your pages look on mobile and desktop devices and how EverWeb switches automatically page type as needed!


Bonus Tips…

1. When you build mobile pages remember to include Search Engine Optimisation which is increasingly important in the mobile arena.

2. Remember to make a ‘404 Error Page’ for your mobile website. It’s not only desktop pages that need it!


Creating Master Pages for EverWeb’s Theme Templates

$
0
0

Gone are the days when the word ‘template’ immediately conjured up pictures of really bad looking PowerPoint presentations! Today templates are design savvy. EverWeb has over 40 stylish theme templates in a wide variety of subjects for you to choose from.

All EverWeb themes include ‘Home’, ‘Contact’, ‘Photos’, ‘Videos’, ‘Blank’ and ‘Mobile’ template pages. Some themes also include a ‘Coming Soon’ and/or ‘Shop’ template.

As EverWeb organises template pages by theme, it’s quick and easy to develop a professional looking website in next to no time. All themes include EverWeb’s built in widgets, such as the Navigation Menu, Contact Form, Google map etc.

Template themes are a good way to learn about designing websites in EverWeb as well the exploring the product’s own feature set. For example, the ‘Aurora’ theme includes the ‘Full Width’ feature introduced in EverWeb version 1.8. Theme templates also help you test out your own ideas without the hassle of building test pages first from scratch.


Using EverWeb’s Template Themes

To use a theme template, just select the ‘Add Page’ button. Click on the theme of your choice from the list on the left, then click on the template you want to the right. Click the ‘Select’ button to add the template to the Web Page List (see below).


teach1

The EverWeb theme template selection dialog box


A theme template is only downloaded to your computer when you select it for use for the first time. When you select your theme template page, EverWeb automatically downloads the theme and then adds the page you selected to the Web Page List. Theme templates not yet downloaded to your computer are indicated by a down arrow within a circle icon to the right of the theme name. Pressing on the icon initiates a ‘manual’ download of the selected theme template.


Creating a Master Page to Use With Your Theme Template

If you have already added theme template pages, such as ‘Home’, ‘Photos’, ‘Contact’ etc., to your EverWeb Project, you can customize each as you would any other web page that you would create yourself. Some objects on your theme template pages use EverWeb’s built in Widgets. To access a widget’s customization features, click on the ‘Widget Settings’ cog in the Inspector Window.

If you find that you are making the same customisations for every page type e.g. changing the background color, using a Master Page instead would be better as it will save time and effort now and for any future customisations that may be needed. Here’s how you can quickly add a theme based Master Page to your template page…

In our example, we will be using the ‘Teacher’ template to build a website for our fictional teachers ‘Tim and Tim’, who provide tuition services for those with learning difficulties at their school.

1. If you have not done so already, create a website project. When you create a new Project you will be asked to add a page immediately. Scroll down the theme template list on the left and select the ‘Teacher’ theme.

2. Next, scroll down the right hand side of the dialog box which shows you the templates available for the chosen theme. Click on the  ‘Blank’ template page, then press the ‘Select’ button.

3. If the ‘Teacher’ theme template has not been downloaded already, EverWeb will do this automatically. The ‘Blank’ page incorporating the ‘Teacher’ theme will be added to your Web Page List.

4. To create our themed Master Page, click on the ‘Blank’ page name in the Web Page List and drag and drop it into the blue section above. This area is where Master pages are listed.


tim0a

The blank ‘Teacher’ theme template added as a Master Page by dragging and dropping the ‘Blank’ page from the Web Page List into the blue area.


5. You will now see that a Master page called ‘Blank’ has been created. Double click on the name of the Master page, rename it and press enter to complete the renaming. Now customize the page as you wish. In our example, we have changed the background color, the text itself to ‘Tim & Tim Teaching’, the font size and style, added a YouTube social media button (or video learning) and moved the buttons to the left hand side, making them fixed position so that as the visitor scrolls up and down the page, the buttons stay in place. The Navigation Menu widget was also customized and centered with the rectangular shape resized. All these changes only took a few minutes to complete. You can see the results below…


tim0b


6. You can now use this template on any new pages you create. To add a ‘Home’ page to our website project, first click in the grey area of the Web Page List. To add the ‘Teacher Home’ page theme template click on the ‘Add Page’ button and select the Teacher ‘Home’ page template style.

7. Once the ‘Home’ page has been added (shown below), go to the Inspector Window. In the ‘Page Settings’ tab, attach the Master Page that you created earlier using the drop down box beside ‘Master Page’. You will know that the Master Page has been attached as the ‘Home’ page background changes and some objects now have Master Page object symbols in their top right hand corner as shown by the black page symbol.


ns 1

The default Teacher theme Home Page template.


8. Notice that you now have some objects on the page twice. One of the duplicates includes the Master Page object symbol in the top right hand corner. As you cannot delete this from the normal page, select the other duplicate and delete that one instead. Repeat the process until all duplicates are removed. Remember that some objects may lie completely on top of their Master Page counterparts, and also remember objects that may be in the footer of the page. Once you are finished, you have a restyled ‘Home’ page customized, but still based on the original Teacher theme (see screenshot below).


t final

The completed Home page…


9. Repeat the process above until you have all of the pages you want. You can delete the ‘Blank’ page from the Web Page List as it was only needed to make the Master page.

Don’t forget to fill in the Page Settings tab so that you get the best SEO possible. Check out our previous Blog ‘How To Use EverWeb’s SEO Features‘ for more information. If you want to know more about Master Pages, take a look at our Blog ‘All You Need to Know About EverWeb Master Pages‘.

Finally, to see the results of your work, use Preview before you finally publish your website!

Make Your Mark with Image Masking in EverWeb

$
0
0

EverWeb’s Mask tool is an easy way to hide part of an image without having to crop the image itself. Masking is great when you want to keep an image in tact. It’s also useful as you can reuse one image in a number of different ways so saving you time and effort. Here are some ideas on how you can get the most out of image masking…

First create a web page and style it as you wish. In the example below, we are using an online financial news service covering the Stock Market. The web page created has a newspaper style format. The web page illustrates that it’s been a good week on the Stock Market emphasising this by using the image of a bull to show a ‘bullish’ market.

Place the image you want to use on to the Editor Window by dragging and dropping it from it’s original source. Place and resize the image according to your own requirements.


city bulls1

The example web page shows the original image in the top right. Masks of the original image appear with different effects behind  behind the headline and in the second half of the page.


In our example, the complete image is shown in the top right of the page underneath the headline. We can now reuse the image in our news article. To do this, either select the image in the Editor Window and copy and paste it as many times as desired or drag and drop the image on to page as many times as you want from the Assets List.

These two methods use the same image file in the Assets List. Do not repeatedly drag and drop the image on to the Editor Window from it’s original source as all you will be doing is duplicating the file in the Assets List. It will also lead to slower page download speeds as well as you have to download multiple images and not just one image.

In our example, we want to isolate the bull in the picture and use just part of the image picture later on in the page. To do this, first select the image that you have copied. Next we will apply a mask.

Click on the ‘Mask’ button in the Toolbar at the bottom of the Editor Window. Alternatively, use Format-> Mask from the menu, or for speed, the shortcut key Shift+Cmd+M.

The Editor Window will now become somewhat opaque. This is the mask itself that covers the whole Editor Window. The square window at the centre of the image is the ‘unmasked’ area and is bordered with a dashed line. Notice that the image under the mask still has grab handles around it. This means that you can reposition the image  underneath the unmasked square. Click, hold and drag the image to where you want it, just make sure that when you start this operation that you do not click inside the unmasked square itself.

To move the unmasked square over the top of the masked image, click and hold the centre of the square and drag and drop it to the desired location. When you do this operation the unmasked square will then show grab handles around it.

If the unmasked square does not have grab handles around it, click once in the square. You will now be able to resize the unmasked square to show more or less of the underlying image. Click and drag the grab handle(s) to resize the square as you would do with any other object.

When finished, click in an area outside of the whole image. The masking will disappear and you will only see the part of the image that you defined in the mask. It’s important to remember to click outside of the whole image boundary for this to work correctly.

To remove the mask, select the masked image. The Mask button in the Toolbar will now be named as ‘Unmask’. Select this and the whole image will become visible again.

Masked objects are like any other objects and so can be moved, deleted, copied etc. You can add effects to the masked image using the Shape Options and Metrics Inspector options. In our example we have applied some Picture Frames,  changed the masked image shape style from a rectangle to an arrowhead and used the Full Width option to create the banner effect behind the headline.

Images can also be resized even when masked using the grab handles that appear when you select the image. As you do this, the mask will also change in size. This is useful if you find that your original masking was not ‘spot on’ and you need to do some slight readjustments without having to redo the complete mask.

In all other instances, if the masking is incorrect it’s best to unmask then apply the mask again. Additionally, avoid using ‘Undo’ and ‘Redo’ commands (e.g. if you resize the mask area then decide to undo the action) as this can have unexpected results. Finally, to mask successfully, do not move the masking square outside the boundaries of the original image as this may cause unexpected results.

The completed web page above includes four masked pictures and the original picture which should also save time on page download speeds. Masking is a excellent tool to use images in versatile ways whilst also adding design flair to your web pages.

EverWeb 1.9 Released: Enhanced HTML5 Publishing Engine

$
0
0

The speed of your website is extremely important. It not just improves your visitor’s experience, but it also helps ensure higher search engine rankings.

Super Faster Websites With EverWeb 1.9

Over the last few months we worked on a new feature of EverWeb that combines all common assets uses on Master Pages into one directory. This means that your media files and styling information are only exported once resulting in;

  1. Faster website publishing and uploading
  2. Smaller websites
  3. Faster loading websites due to browser caching. This means that for every subsequent visit to your website, they will load faster for your visitors. Also, each page visited by your customers will load faster

Plus we added a few more tricks to get your websites loading much faster;

  1. Better support for retina displays using new HTML5 tags. This means modern browsers such as the latest versions of Safari, Chrome (for desktop and iOS) and Firefox, as well as many other browsers, will load your websites much faster and use less bandwidth.
  2. Faster mobile redirects using optimized code that gets executed as the first instructions to your browsers so mobile pages gets redirected much faster than before. Plus we follow every one of Google’s recommendations for properly optimized mobile pages, without any additional work on your part!

EverWeb 1.9 also has these highlighted new features which we will discuss in more details in future blog posts. We also made a video tutorial outlining the new features for you.

We went even further with EverWeb 1.9 with some highly requested features and enhancements;

  1. A new popup window option under the hyperlink tab so you can link to a page that pops up over the current page
  2. A new presentation mode (Window menu->Presentation mode) to maximize the space given to the design canvas. This feature hides the web page list, toolbar and Inspector so smaller screens can see their entire website design
  3. The ‘open in new window’ option under the hyperlinks tab now works for the link to ‘one of my pages’ and ‘to a file’ option. Now you can open PDF documents for example in a new window without any additional code or widgets

Easily Update To EverWeb 1.9

We’ve got a lot more packed into EverWeb 1.9. You can easily update by;

  1. Launching EverWeb and going to the EverWeb menu at the top of your screen and selected ‘Check for Update’
  2. Downloading EverWeb from the EverWeb website.

Remember, you won’t lose any previous data when updating since your website project files are stored elsewhere on your computer.

Do You Like EverWeb 1.9?

Tell us what you think, head over to our growing discussion forum and lets talk about the new features in EverWeb 1.9!

Helping Each Other

Oh and one more thing, we’re really obsessed with offering the best support! One big issue we found is that sometimes we need your website project files which can be BIG. So we built in a way to quickly share your project file with us. Simply click the little arrows in the projects window and select the ‘Send to RAGE Software Support’. Your project file will be automatically sent to us, no more using dropbox or other file transfer service.

New User Interface Customizations in EverWeb 1.9

$
0
0

EverWeb version 1.9 comes with new options to customize the User Interface (UI) to suit your needs when creating and editing your web pages. Before looking at the new version 1.9 features, it’s worth reviewing the UI features that can be found in previous EverWeb versions…

If screen real estate is at a premium, you can hide the Inspector Window on the right hand side of EverWeb’s UI. Use the menu command Window->Hide Inspector, or the keyboard shortcut Alt+Cmd+I (see screenshot below). Hiding the Inspector Window is especially useful when working with a small screen size laptop. The option only works whilst the Project is open. If you close the Project, or quit EverWeb, the Inspector Window will be visible by default the next time you open the Project.

WPL TB Mode

The EverWeb UI with the Inspector Window hidden using shortcut key Cmd+Alt+I


If you want to hide the layout and object border lines so you can more easily see how your design is going to look, use the Window-> Hide Layout menu option or the Shift+Cmd+L keyboard shortcut. In addition to the layout and object border lines being hidden, all other markers such as Master Page object symbols (the black page symbol), the locked object Padlock symbol and grouped objects borders are also hidden. There is one exception to this which is the Hyperlinks Indicator. To turn off this indicator use the EverWeb-> Preferences-> General menu option.

As with ‘Hide Inspector’ if you close your Project or quit EverWeb, the settings will need to be reapplied next time you open the Project.

The new EverWeb version 1.9 introduces some new UI customisation features that can be used in conjunction to those described above. The first new UI customisation option is Presentation Mode which hides the Web Page List on the left of the screen, the Inspector Window on the right of the screen and the Toolbar at the bottom. Your current Layout and Hyperlink settings are unaffected.

Presentation Mode is ideal when you want to quickly review the look of your web page layout without using Preview. It’s also perfect when you have limited screen real estate available (see screenshot below). To activate Presentation Mode, select Window-> Presentation Mode from the menu, or use the Cmd+. (period) keyboard shortcut. When in Presentation Mode you can still edit the web page, use EverWeb’s menus and perform secondary clicks on objects as you would usually do. If you have turned off the layout boundary lines, you will notice that in Presentation Mode they become visible when you drag and drop an object around the Editor Window.

Presentation Mode in EverWeb 1.9 with the new University Theme ‘Home’ Template.


When Presentation Mode is selected, you have the ability to add back the Inspector Window and/or Toolbar to create a truly customised look to your work environment. To do so use the Window-> Show Inspector menu option (Cmd+Alt+I) and/or the Window-> Show Toolbar (Cmd+Alt+T) menu option.

TB Mode

EverWeb 1.9 with the Web Page List and the Inspector Windows hidden so that only the Toolbar is displayed.


If you only want the EverWeb UI to show Web Page List, and not the Toolbar or Inspector Window, first make sure Presentation Mode is off (use Cmd+. toggle to do this). Next unselect the Toolbar and the Inspector Window by the using the Cmd+Alt+T and Cmd+Alt+I commands respectively or by using their equivalent Window menu commands.

WPL Mode

EverWeb 1.9 showing only the Web Page List


Presentation Mode is only valid per session. If you close the project or EverWeb, the setting will need to be applied again next time you open the project.

EverWeb version 1.9 also includes the often requested option to hide the Toolbar using the Window->Hide Toolbar menu option (or Cmd+Alt+T toggle). All Toolbar options are still available through the menus, with Preview being added to the File Menu in the EverWeb 1.9 release. The Hide Toolbar option is applied globally. Once applied, it remains in place and for ALL of your Projects even when you close and reopen them, or if you quit and relaunch EverWeb itself.

WPL WI MOde

EverWeb version 1.9 with the Toolbar hidden using the shortcut key Cmd+Alt+T


EverWeb version 1.9’s new UI customisation options now let you display your workspace as you want it, quick and easy!


Summary of EverWeb’s UI Modes

  • Hide Web Page List, Inspector Window & Toolbar = Presentation Mode (Cmd+.)
  • Hide Inspector Window Only = Window-> Hide Inspector (Cmd+Alt+I)
  • Hide Toolbar Only = Window-> Hide Toolbar (Cmd+Alt+T)
  • Hide Web Page List Only = Presentation Mode + Window-> Show Inspector + Window-> Show Toolbar


Other Useful EverWeb UI Options

  • Hide Layout = Window-> Hide Layout (Shift+Cmd+L)
  • Hide Hyperlink Indicators = EverWeb-> Preferences-> General

Viewing all 375 articles
Browse latest View live